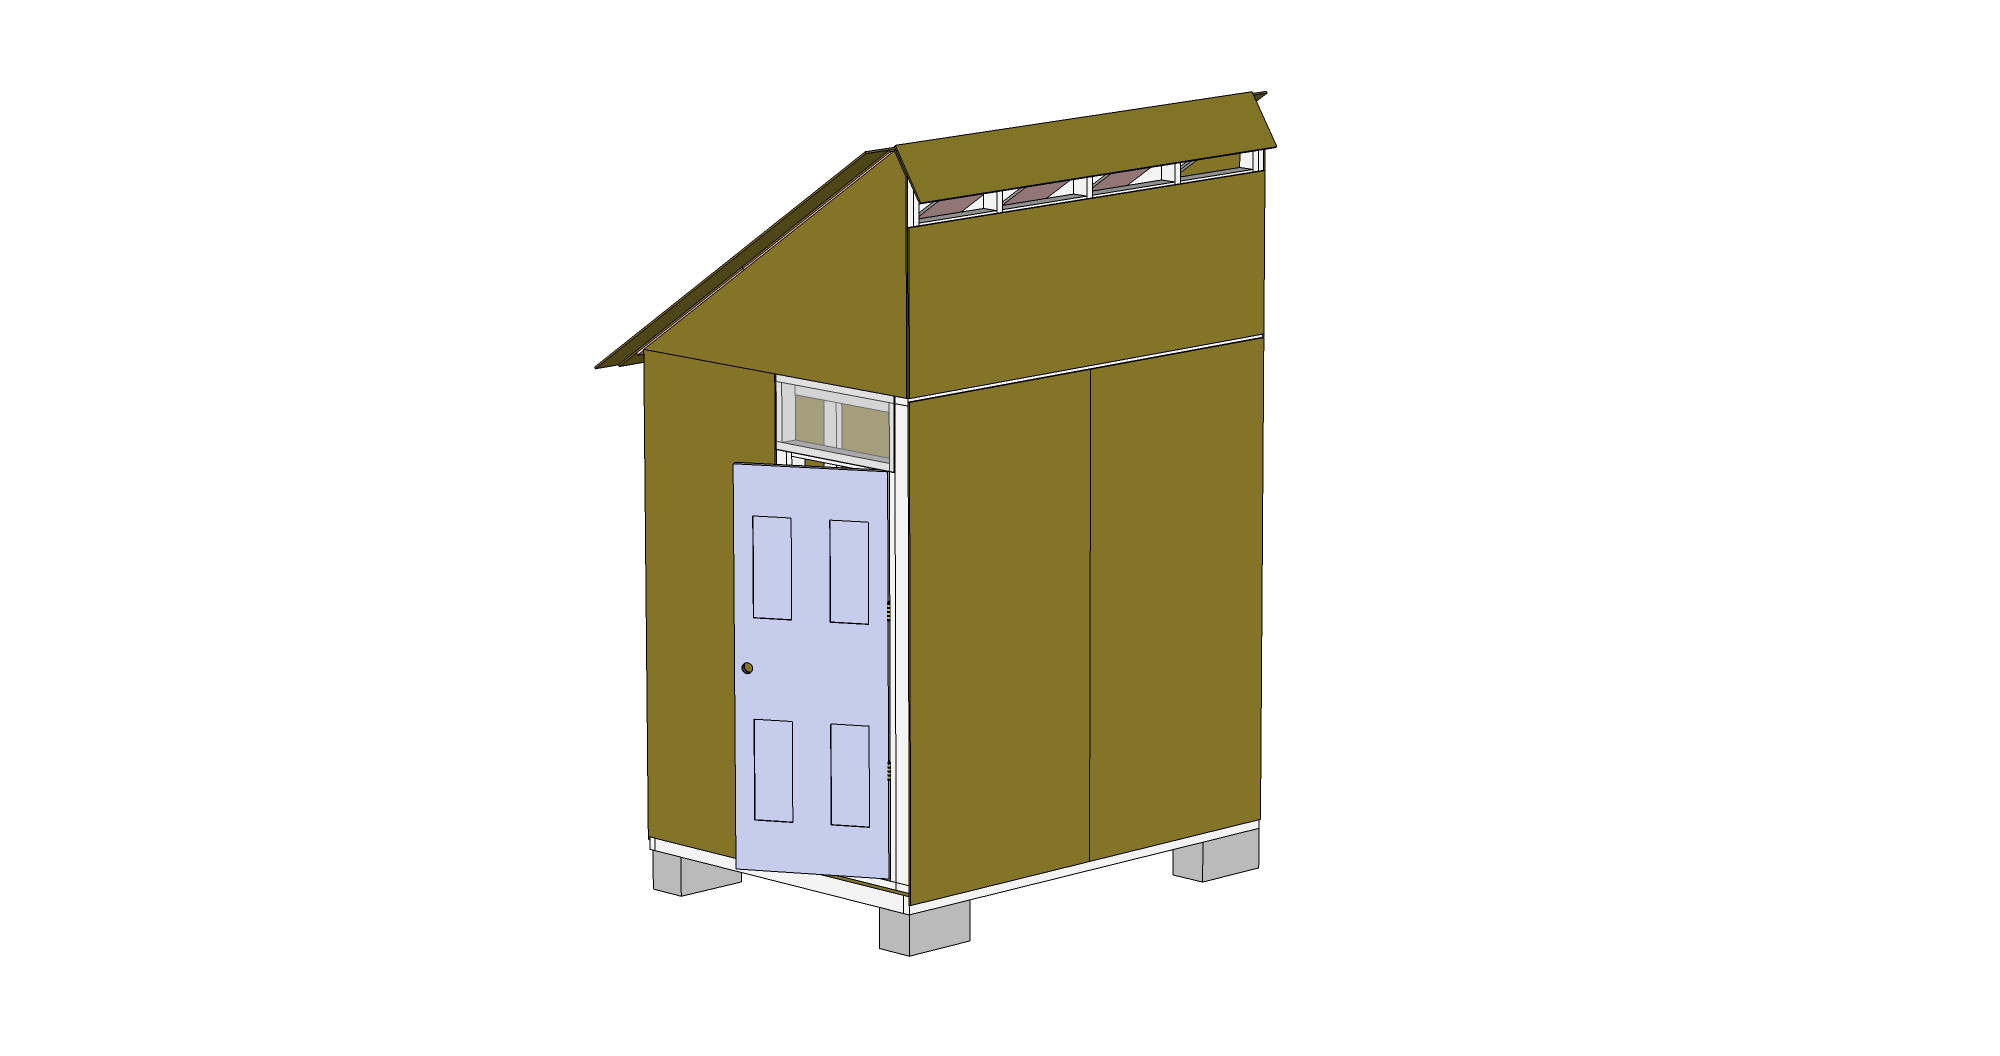
Assembly Guide
Set the floor
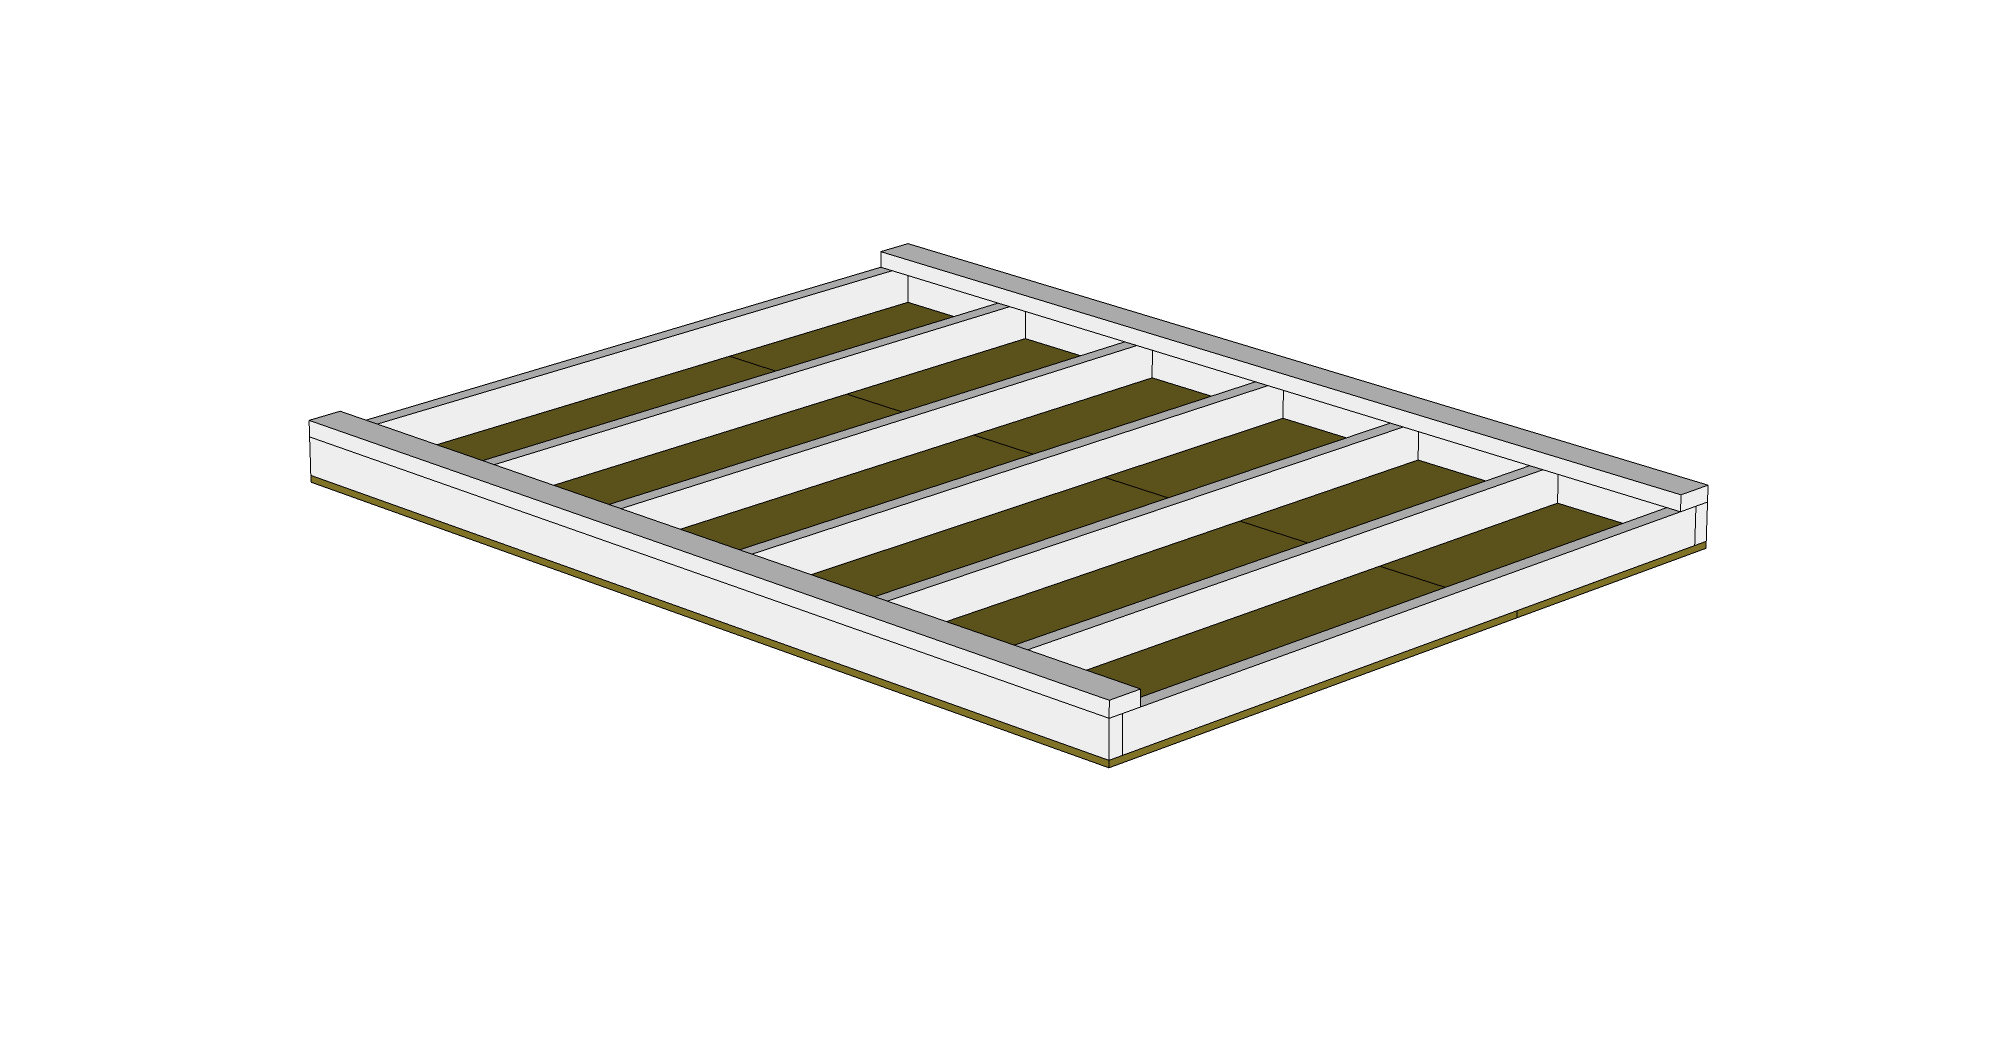
If you haven't already, flip the floor panel over and install the rails. The rails helps the floor studs from pulling apart under the pressure of the hut's weight; they also serve as a sacrificial layer between the floor and the cinderblock it sits upon.
Place floor
 Turn the floor panel back over and place on the cinder blocks. It's important to make sure that the floor is flat and level; a floor that's not flat will have problems when you try to put the roof on later.
Use a level to check for levelness. To check the floor for flatness, sight from corner to corner, or lay the ridge beam from corner to corner. Diagonal gaps or bumps will indicate high or low corners.
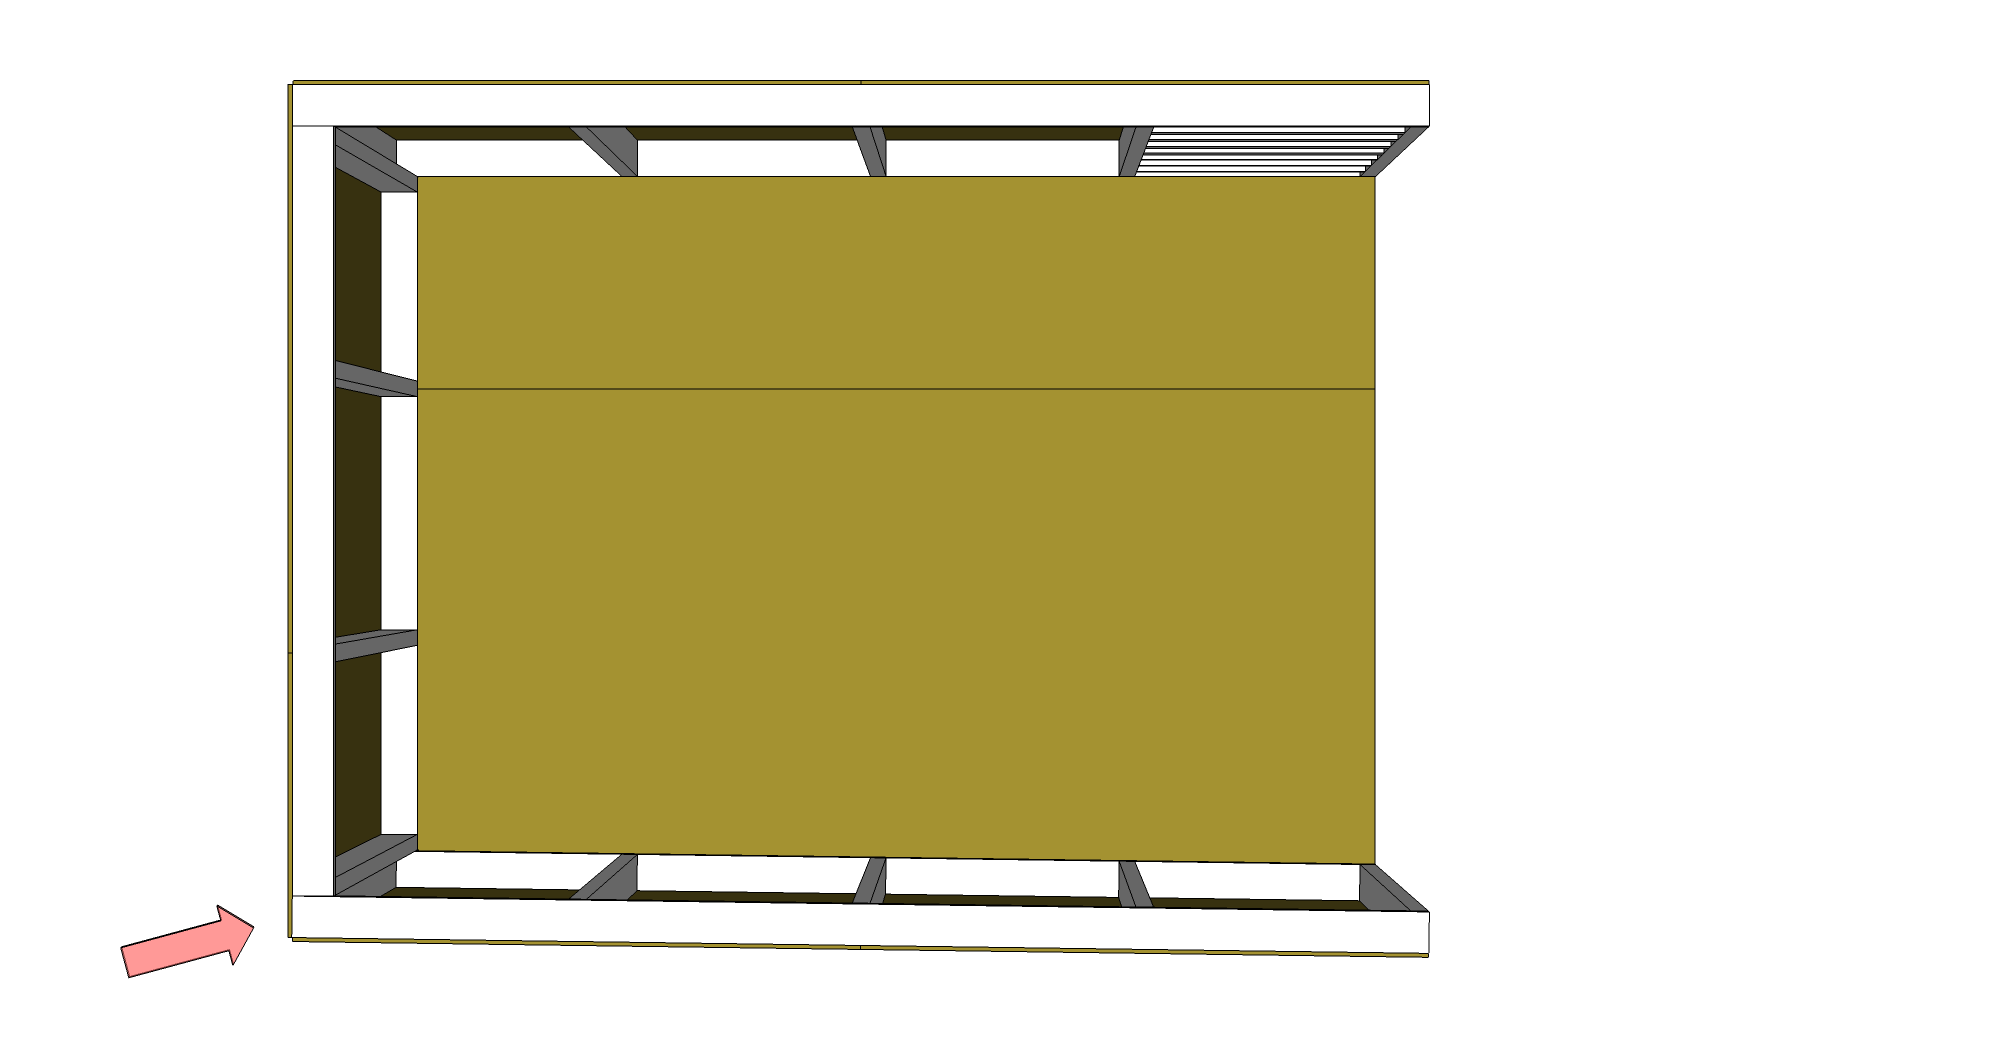
Make the first corner
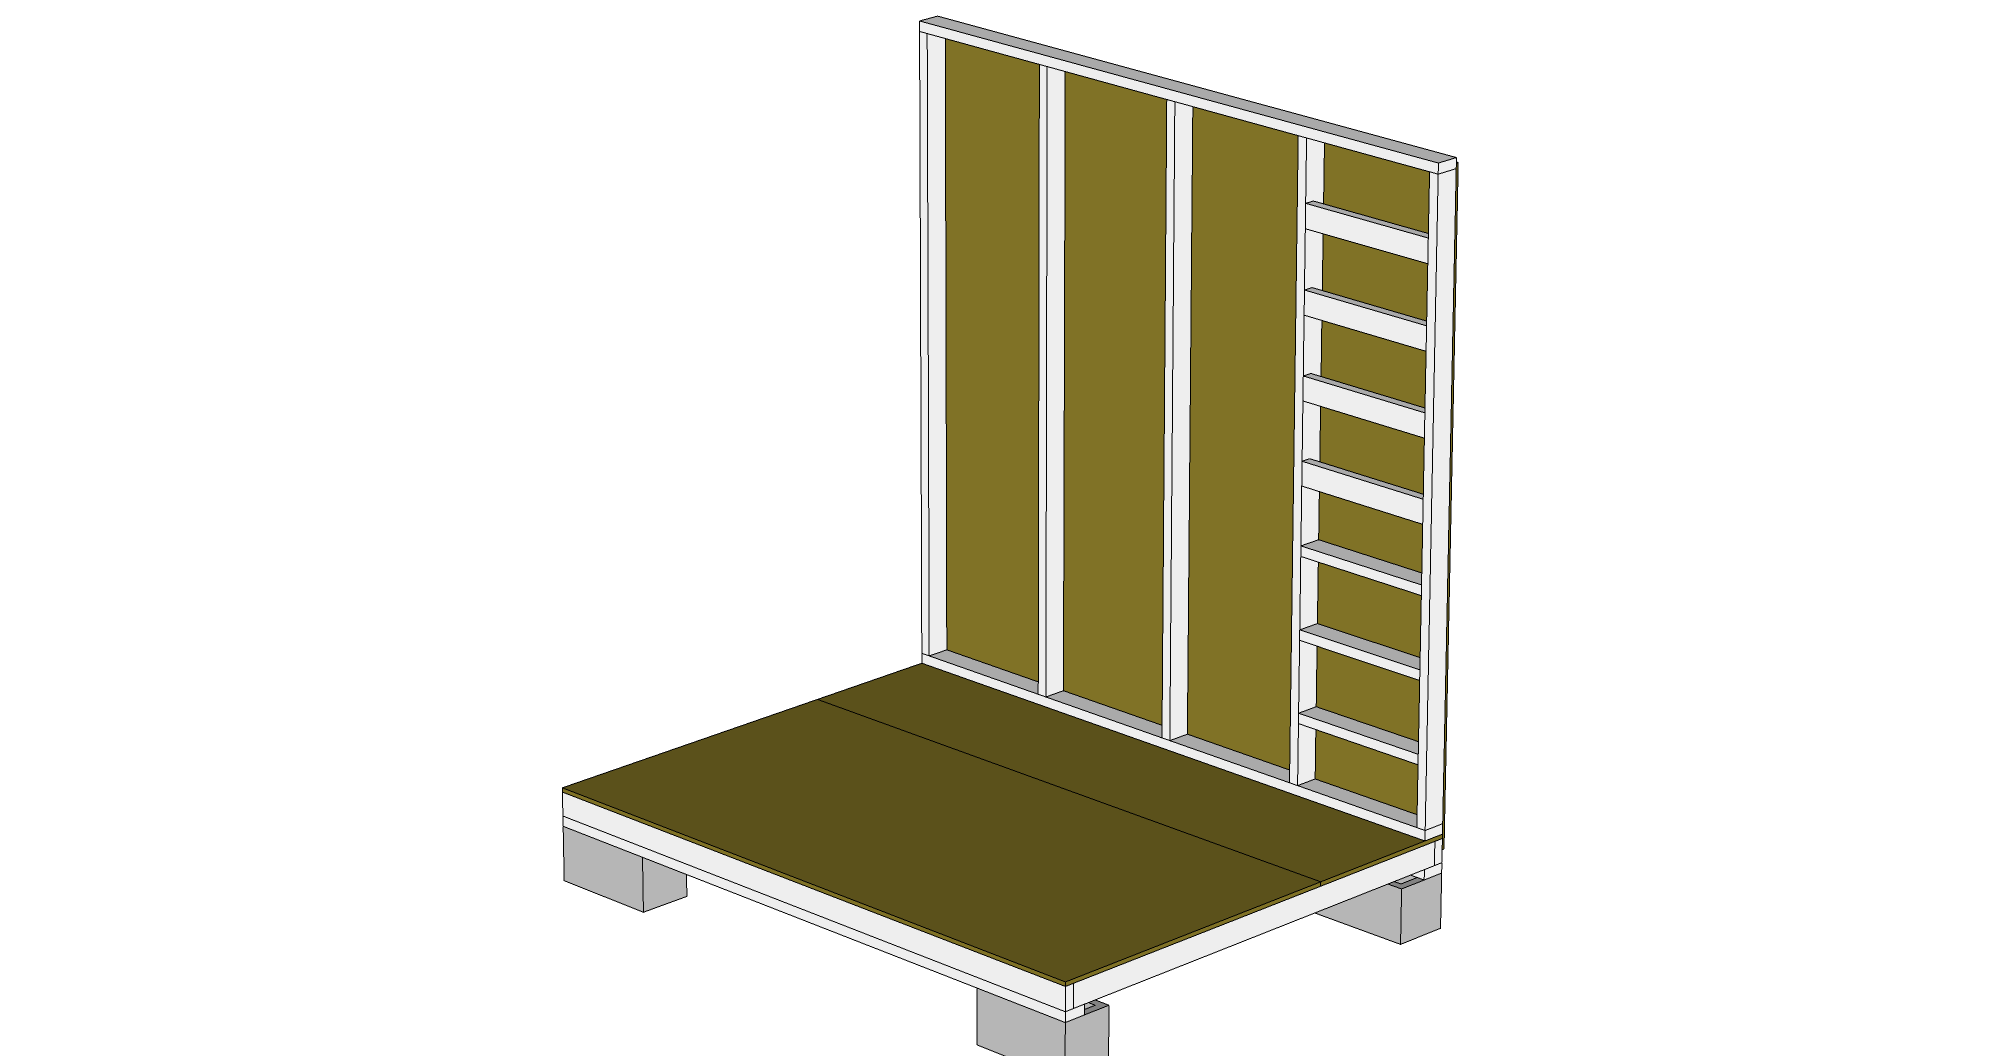
Put in the back wall and a side wall, sliding them up snugly against each other and against the floor. The flap of the narrow panel should cover the rear stud of the wide panel completely. Screw down the wide panel first, making sure it's aligned correctly to the floor. Then snug the narrow panel against it tightly and screw the panels together at the corner. To make sure that the studs have no gap going up, have volunteers lean against the outside of the panels at the corners, pressing inwards, and screw from the bottom upwards. Tight screws at the bottom help pull the panels into true as you work your way up. Adjust the bottom of the narrow panel to ensure it's snug against the floor and screw it down.
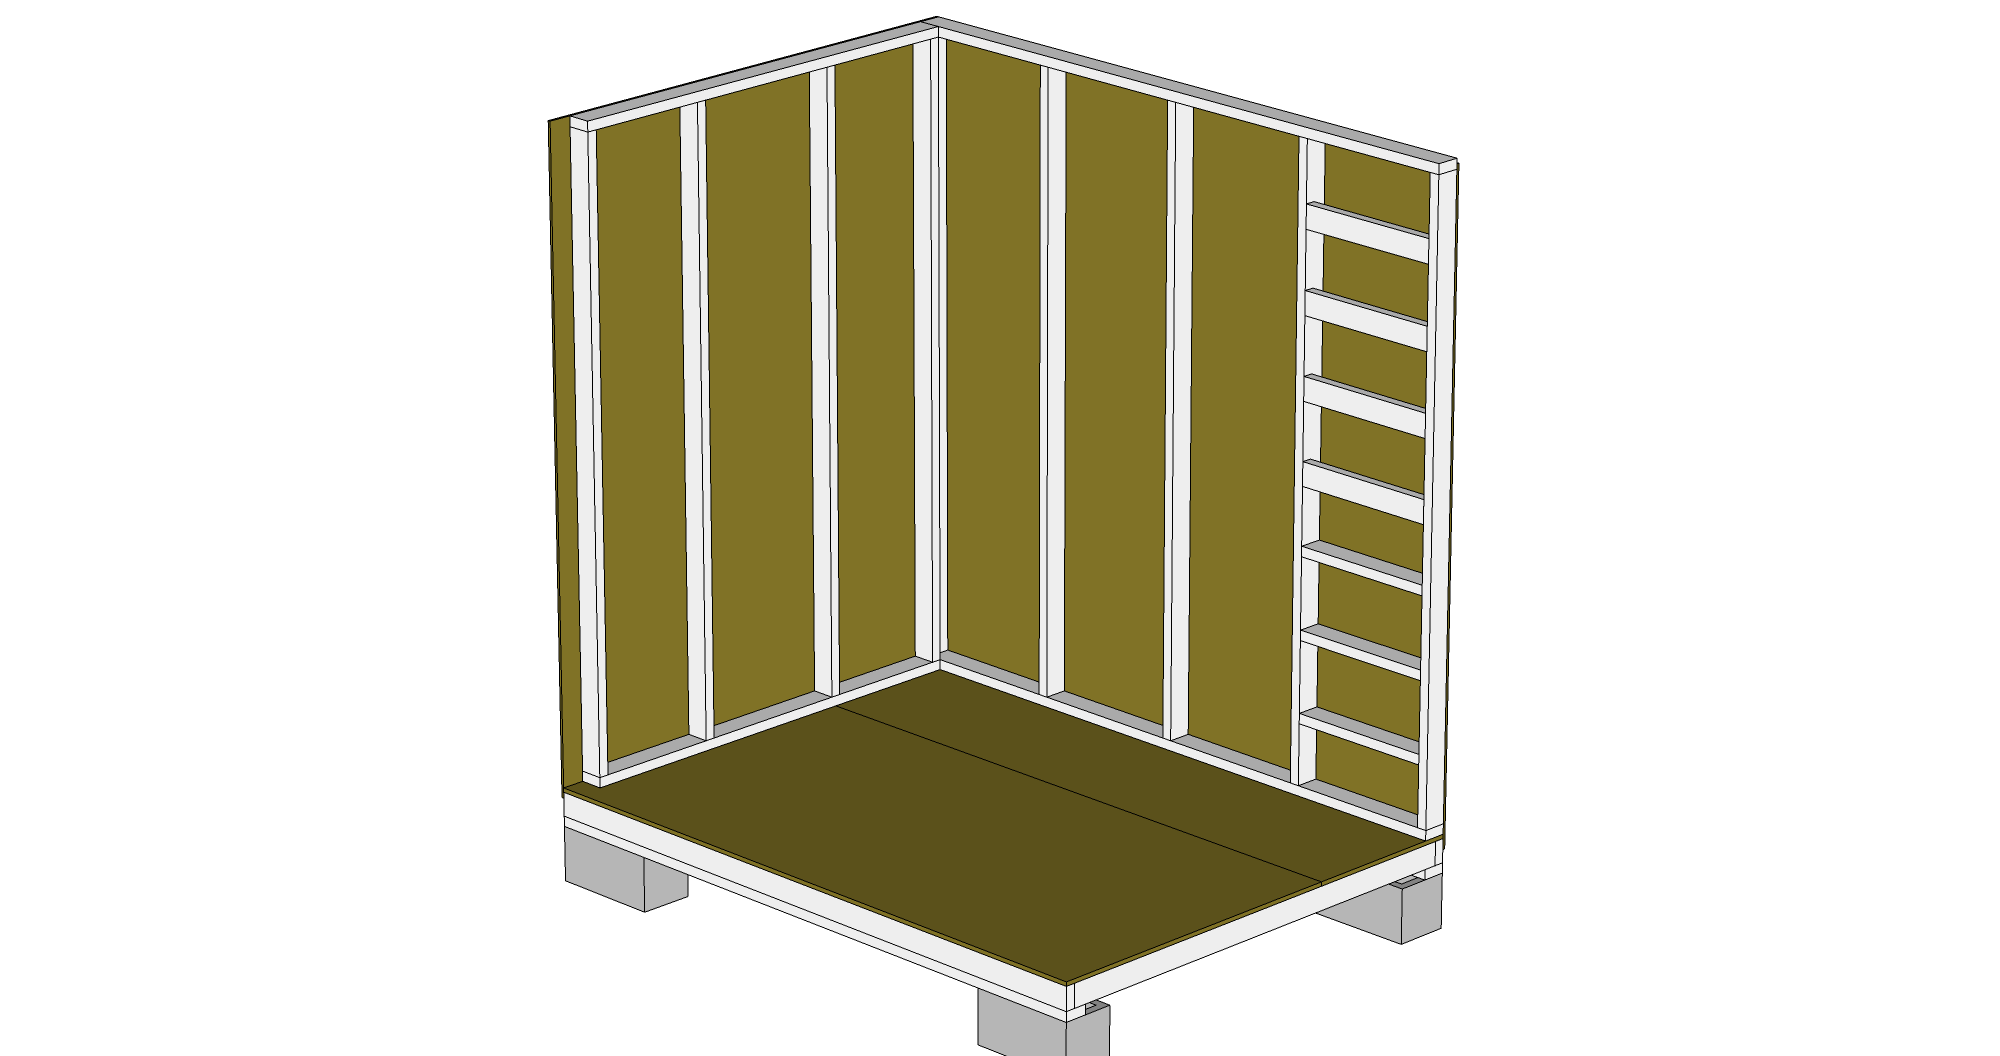
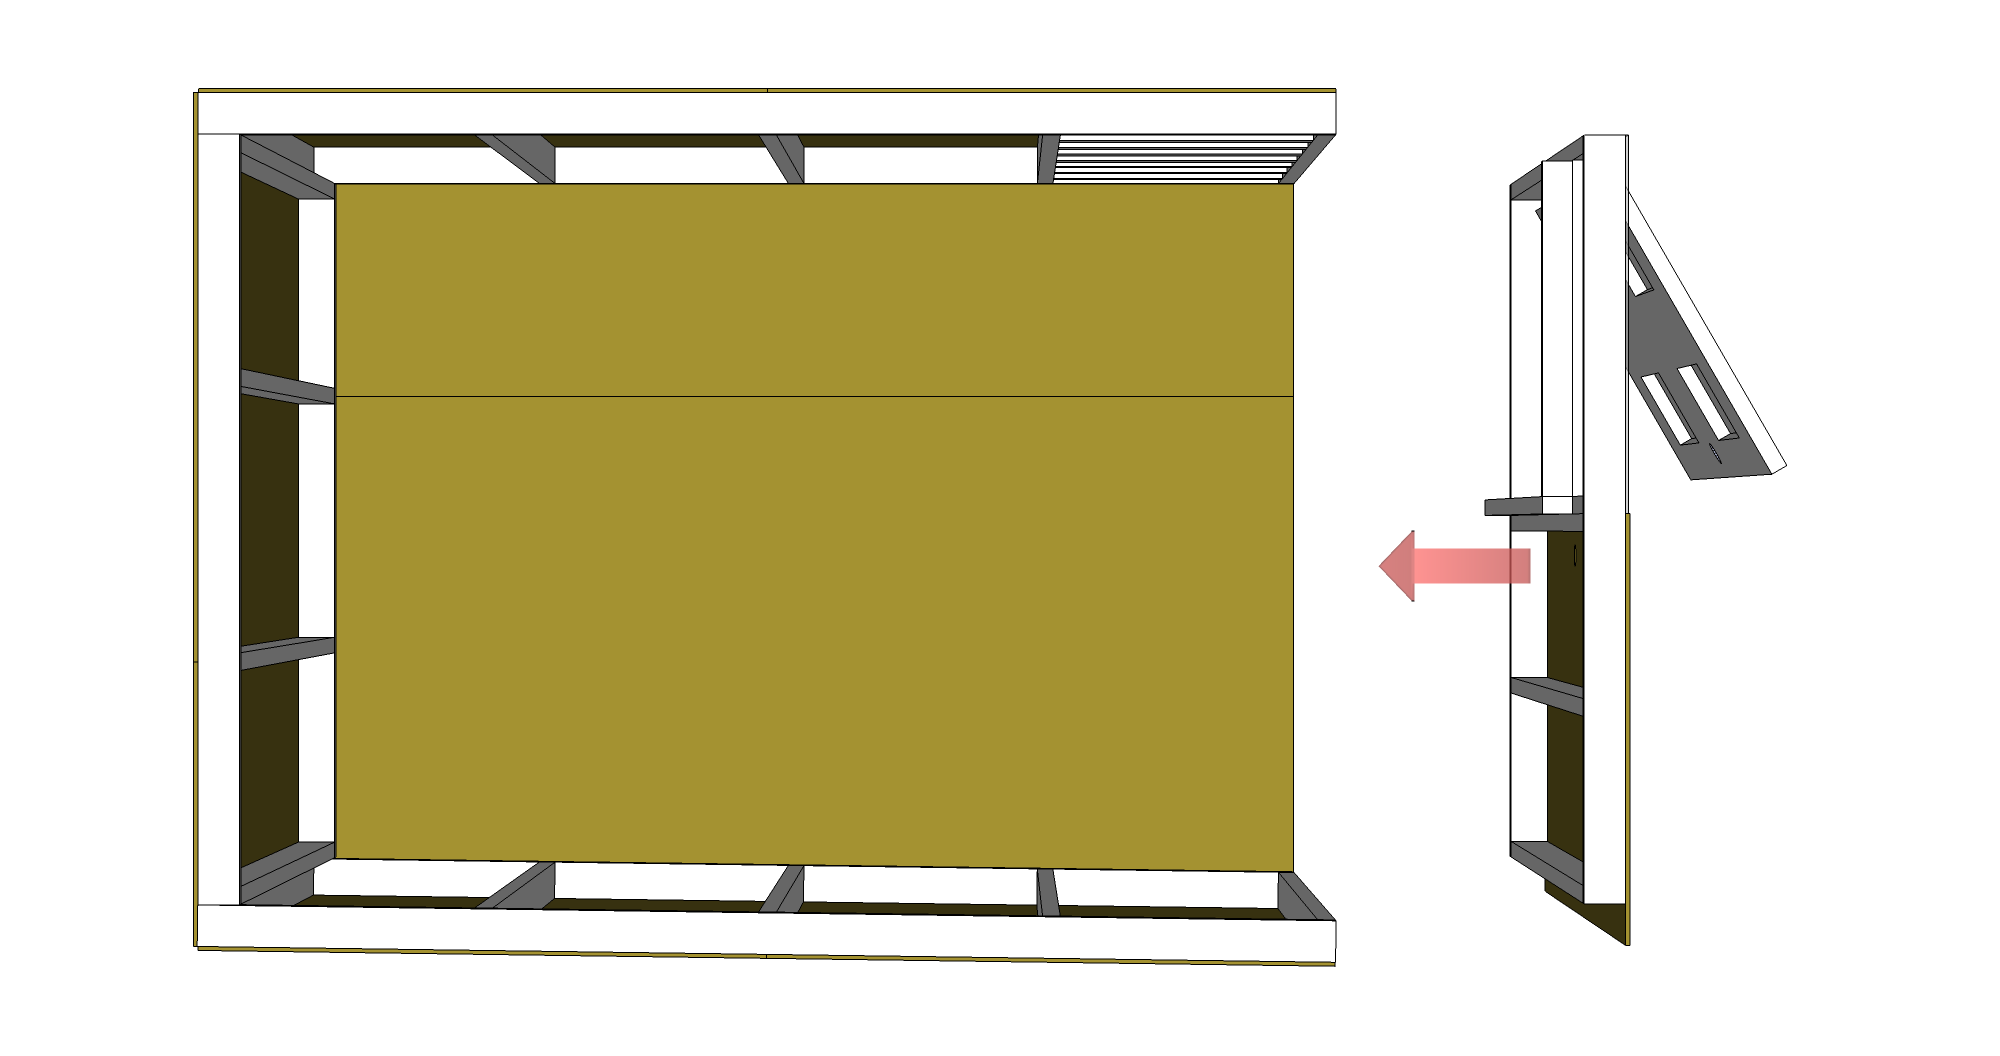
Put up the third wall
Put in the third (non-front) wall and attach it at the corner to the rear panel, but do not screw the side panel down to the floor yet. This will allow you to swing it a little out of the way to install the front panel.
Install the front wall
Slide the front wall into place, push the loose third panel up against it, and screw the front panel to the side walls and the floor.
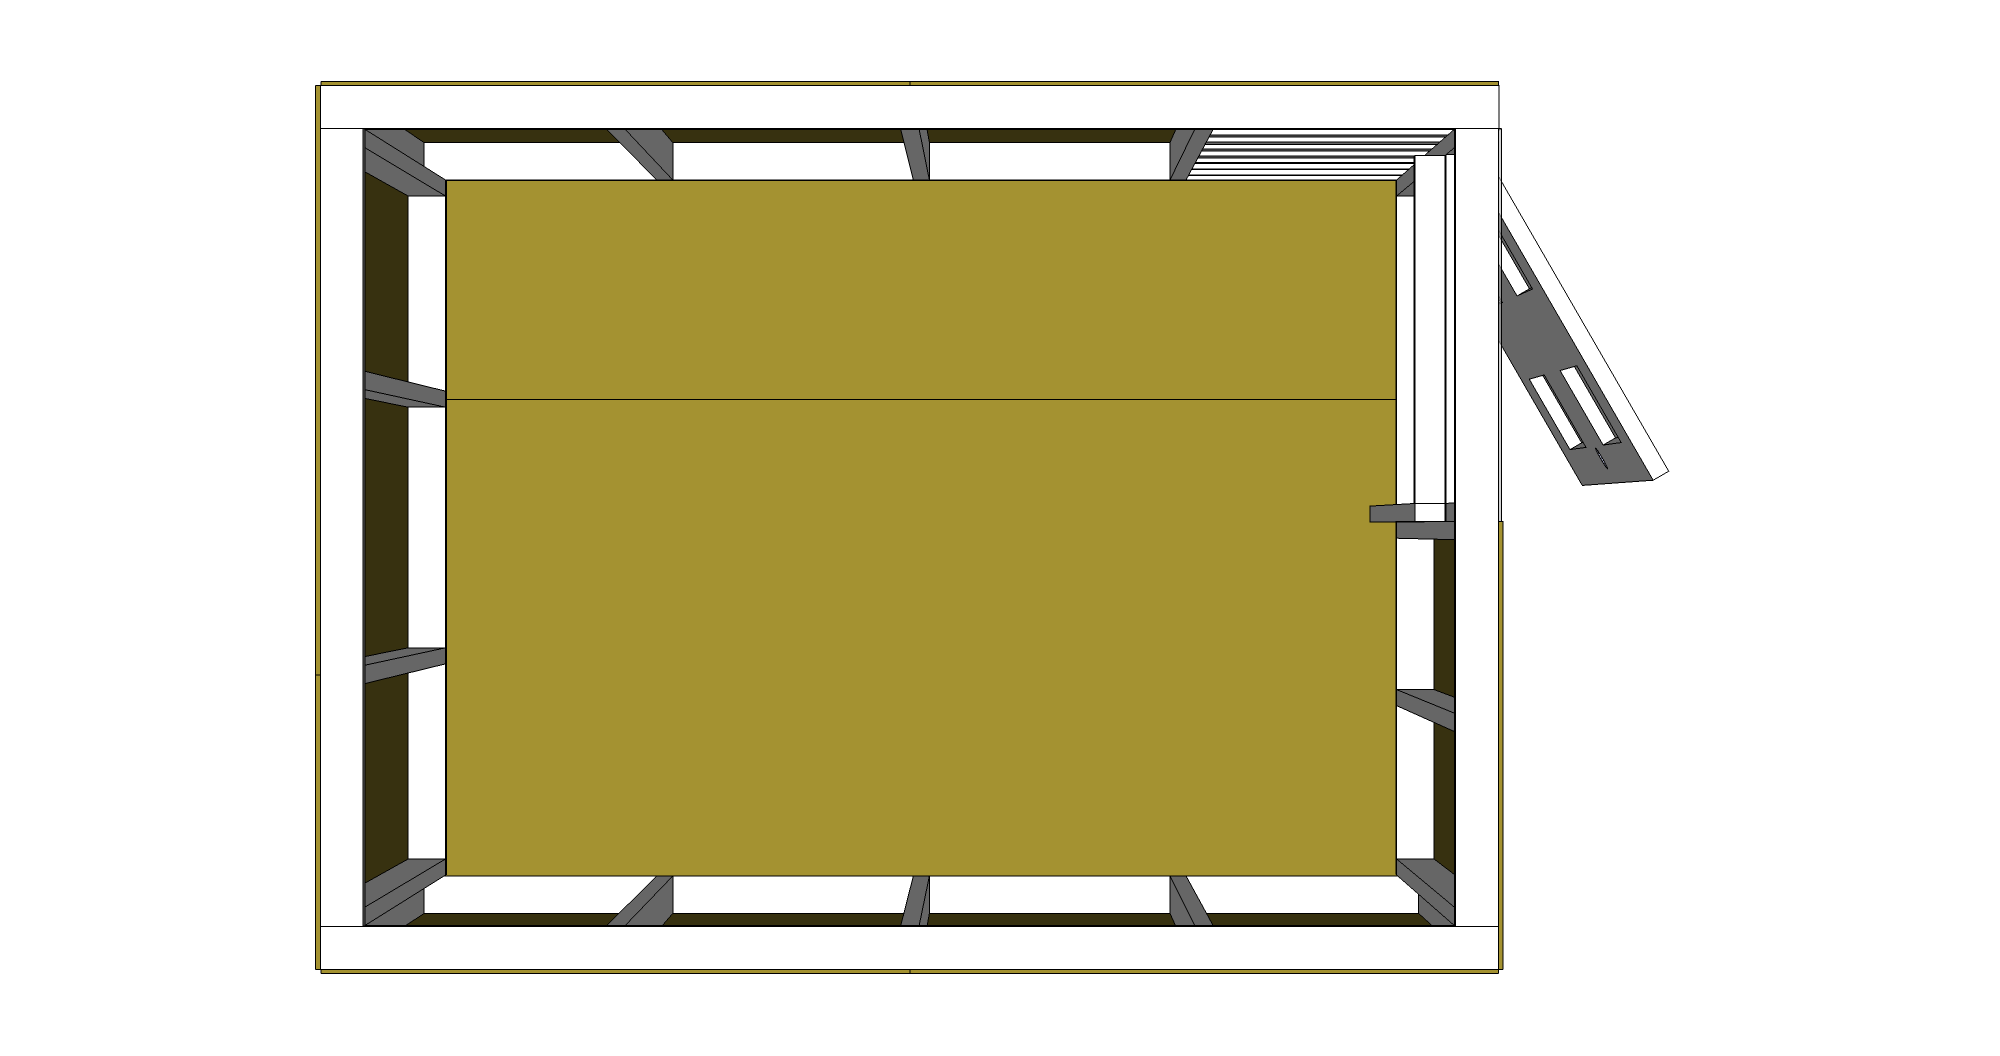 Remember to then screw down the second side wall to the floor.
Install the loft supports
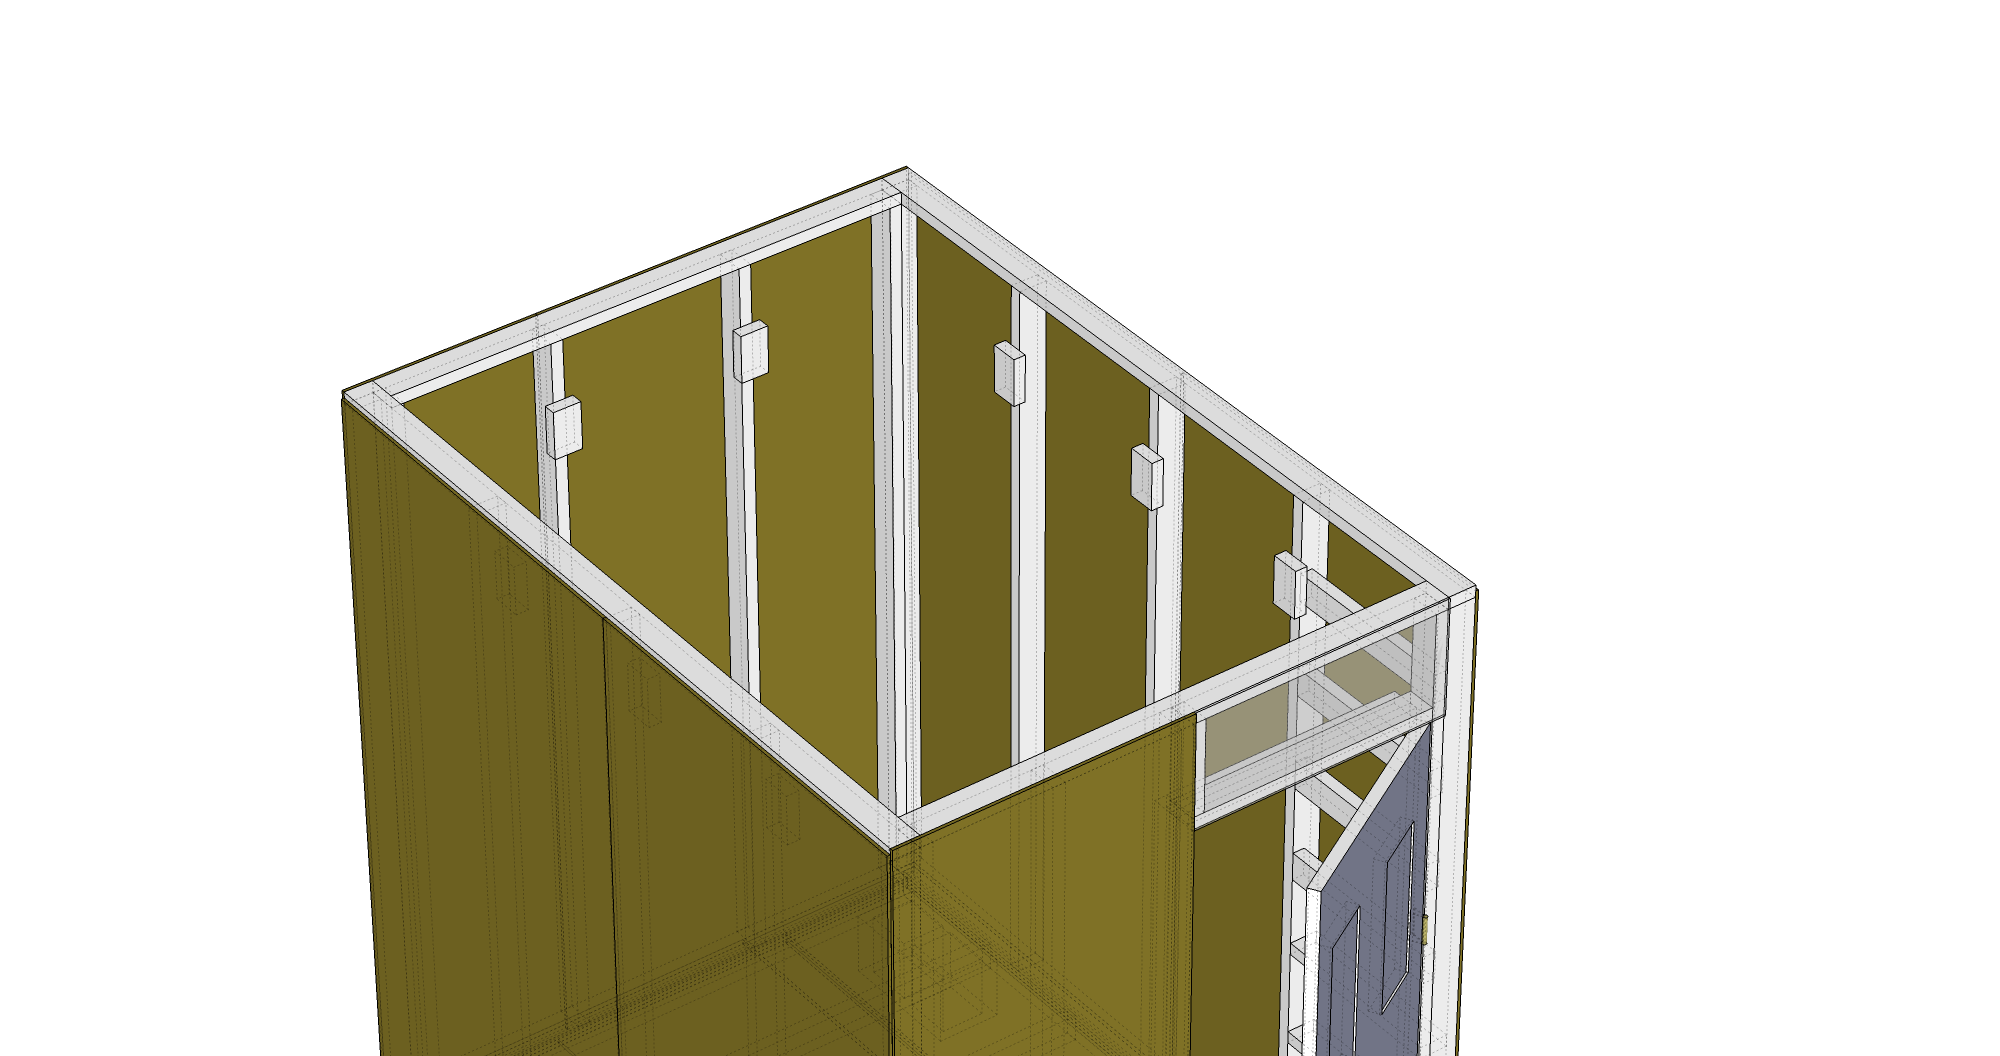
The loft occupies the side of the hut away from the door. When a person enters the hut, they should be able to look straight up and see the ceiling. It will be up against one narrow wall and the two wide walls.

Mark a line at 7 feet on the middle studs of the narrow panel and the wide panels - don't worry about the corners. Nail the loft support studs so that the tops of the studs are at the marks. Use two nails per support to add strength and to keep them from twisting.
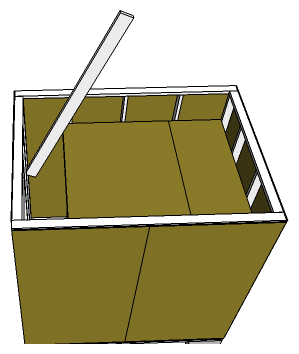
Install the loft, square the hut.
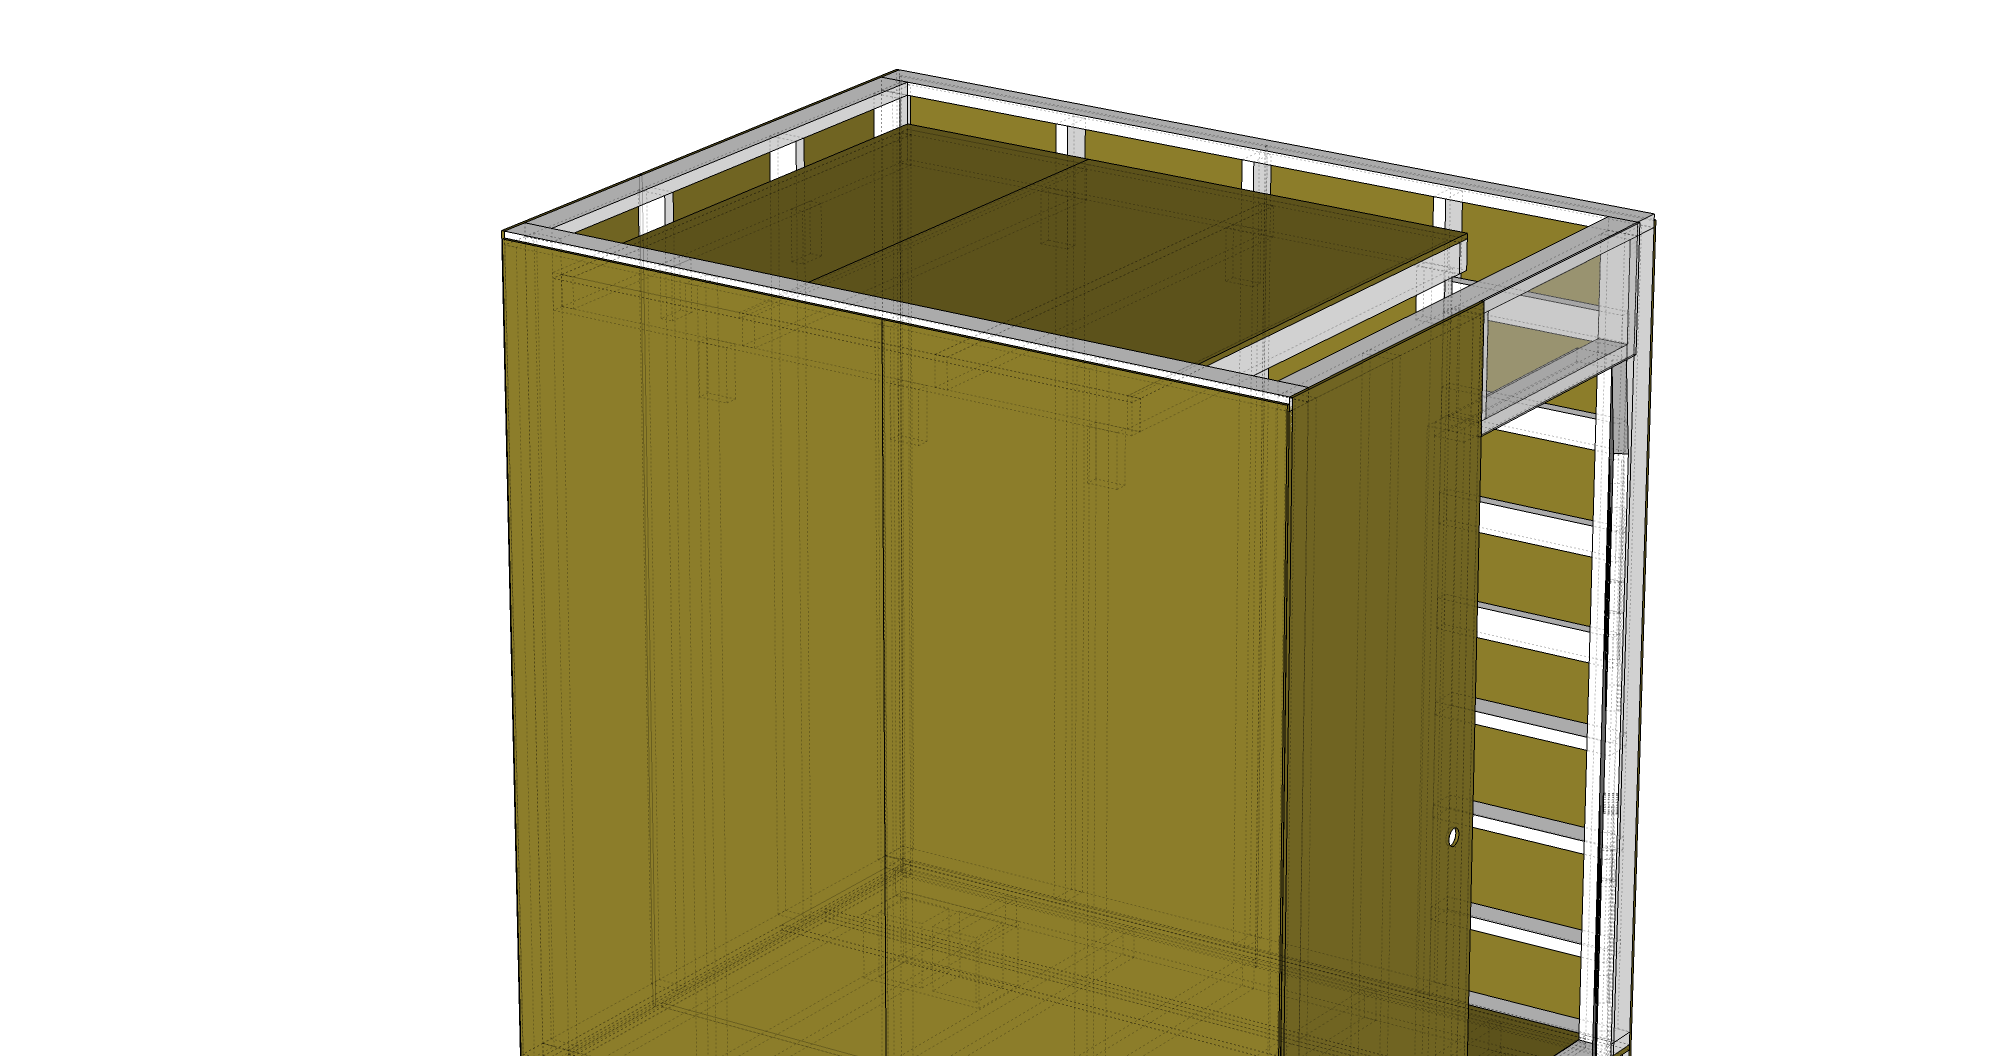
Carry the loft in through the front door. Using at least three volunteers, lift the loft up, tilted, and drop onto the loft supports. Although it may not be touching all of the loft supports, it should at least be over them.
Do not nail the loft into place until you square the hut. Although the hut may start out flat at the bottom, it's possible for the walls to twist or sag at the top corners, like a shoebox without its lid. It will be impossible to install the roof properly unless the top is squared.
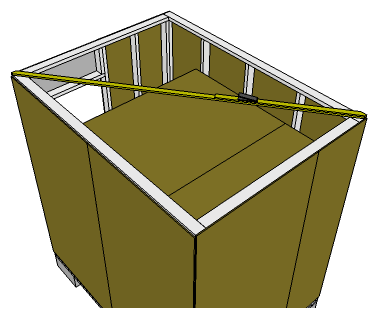
To square, measure diagonally across the top corners of the hut. You can either do this from outside the hut, using ladders, or by having folks standing on the loft (although the loft isn't nailed down, it's safe enough resting on the supports).
Both measurements should come out to around 120 inches. If not, you have two options: push the shorter diagonal out or pull the longer diagonal in.
To push the shorter diagonal out, stand on the loft wedge the ridgebeam between the loft and the front wall against the short corner. A long stud can then be used as a lever to bully the loft into position:
To pull the longer diagonal in, use a heavy tie-down strap to crank the long corners inwards:
Once the diagonals are within a half inch of each other, screw the loft panel into place against the studs, right above the loft supports.
Add the "Topper"
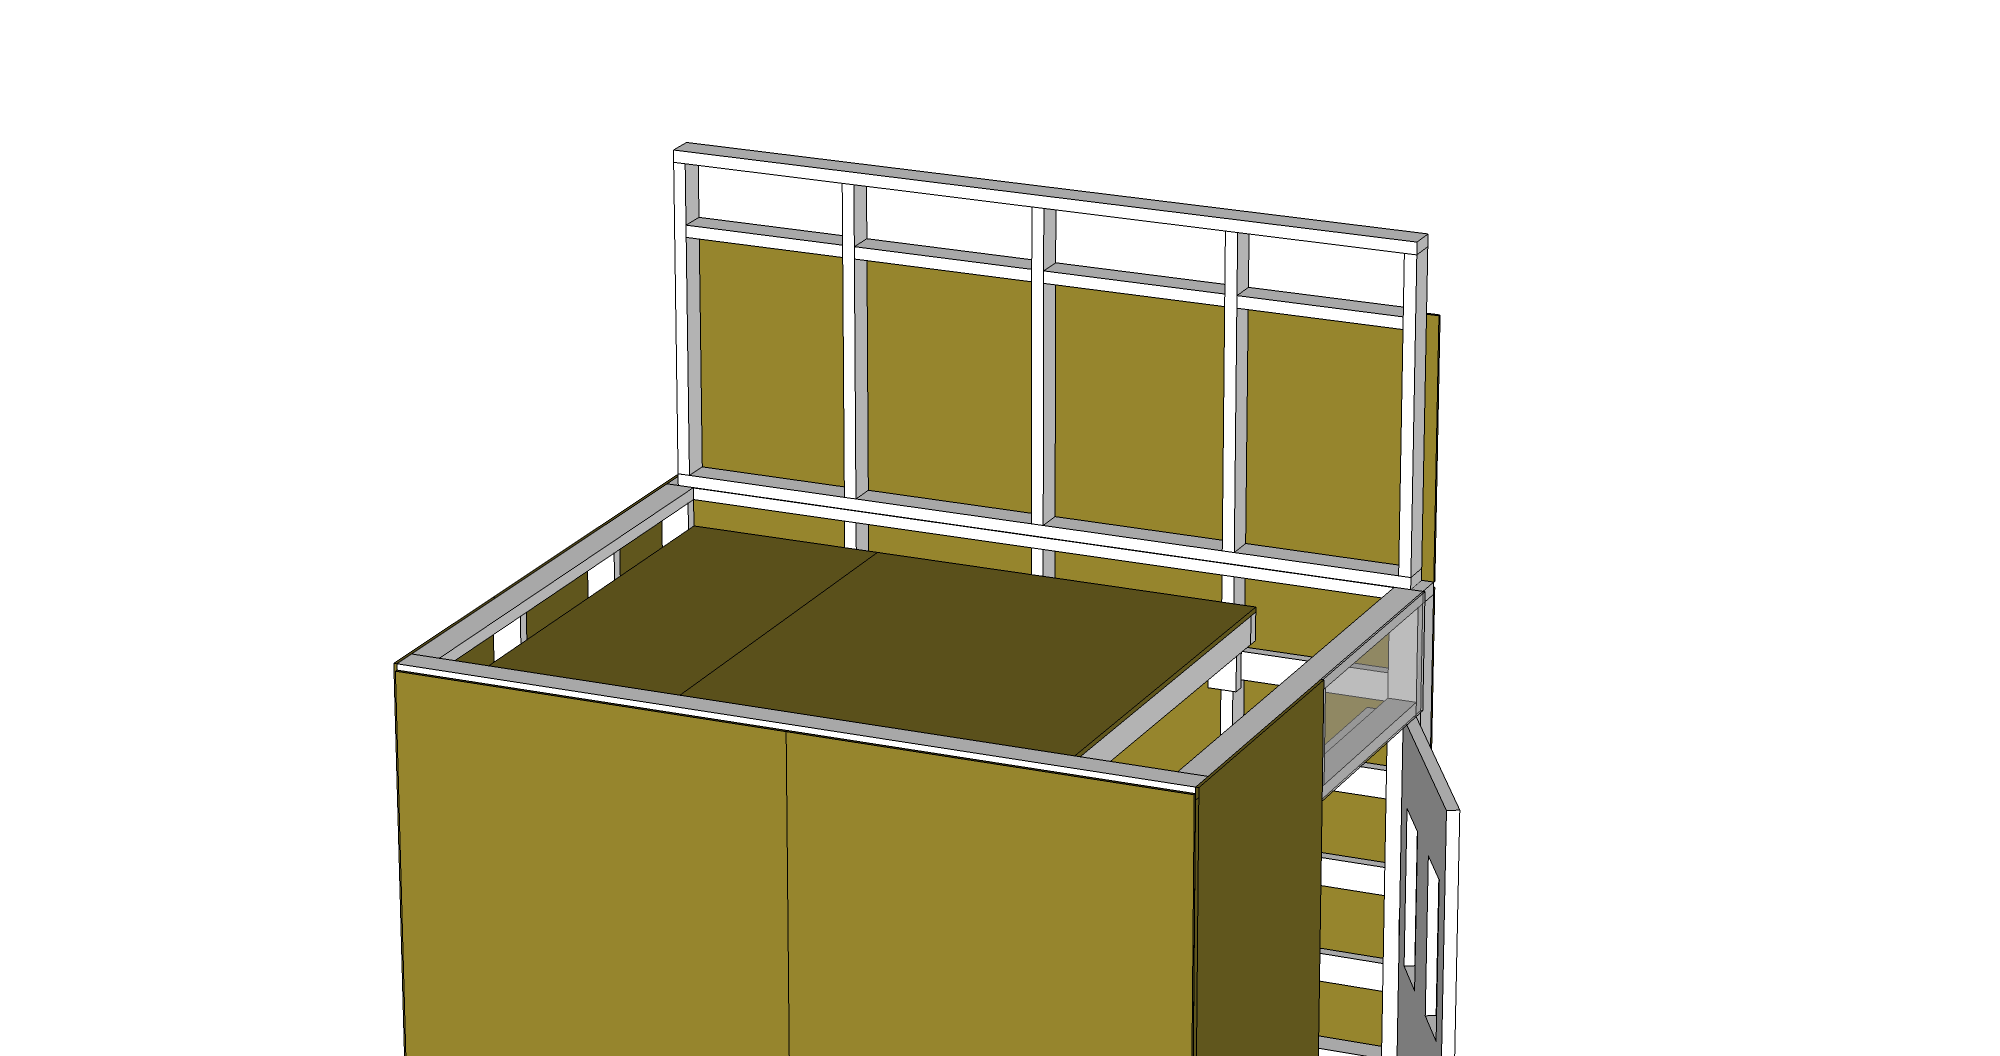 Install the topper panel on the wide wall that will be the 'high' wall. If your door is on the wide wall, this should go on the door side - otherwise, when it rains the bulk of the roof will dump out over the door, and it'll get in the way of a stove installation.
The topper is 93" wide with a 1.5" plywood overhang on each side; it should be centered over the wide wall it's installed on. Basically, the plywood of the topper should match the plywood of the wall below it. Screw the topper into place.
Add Gables
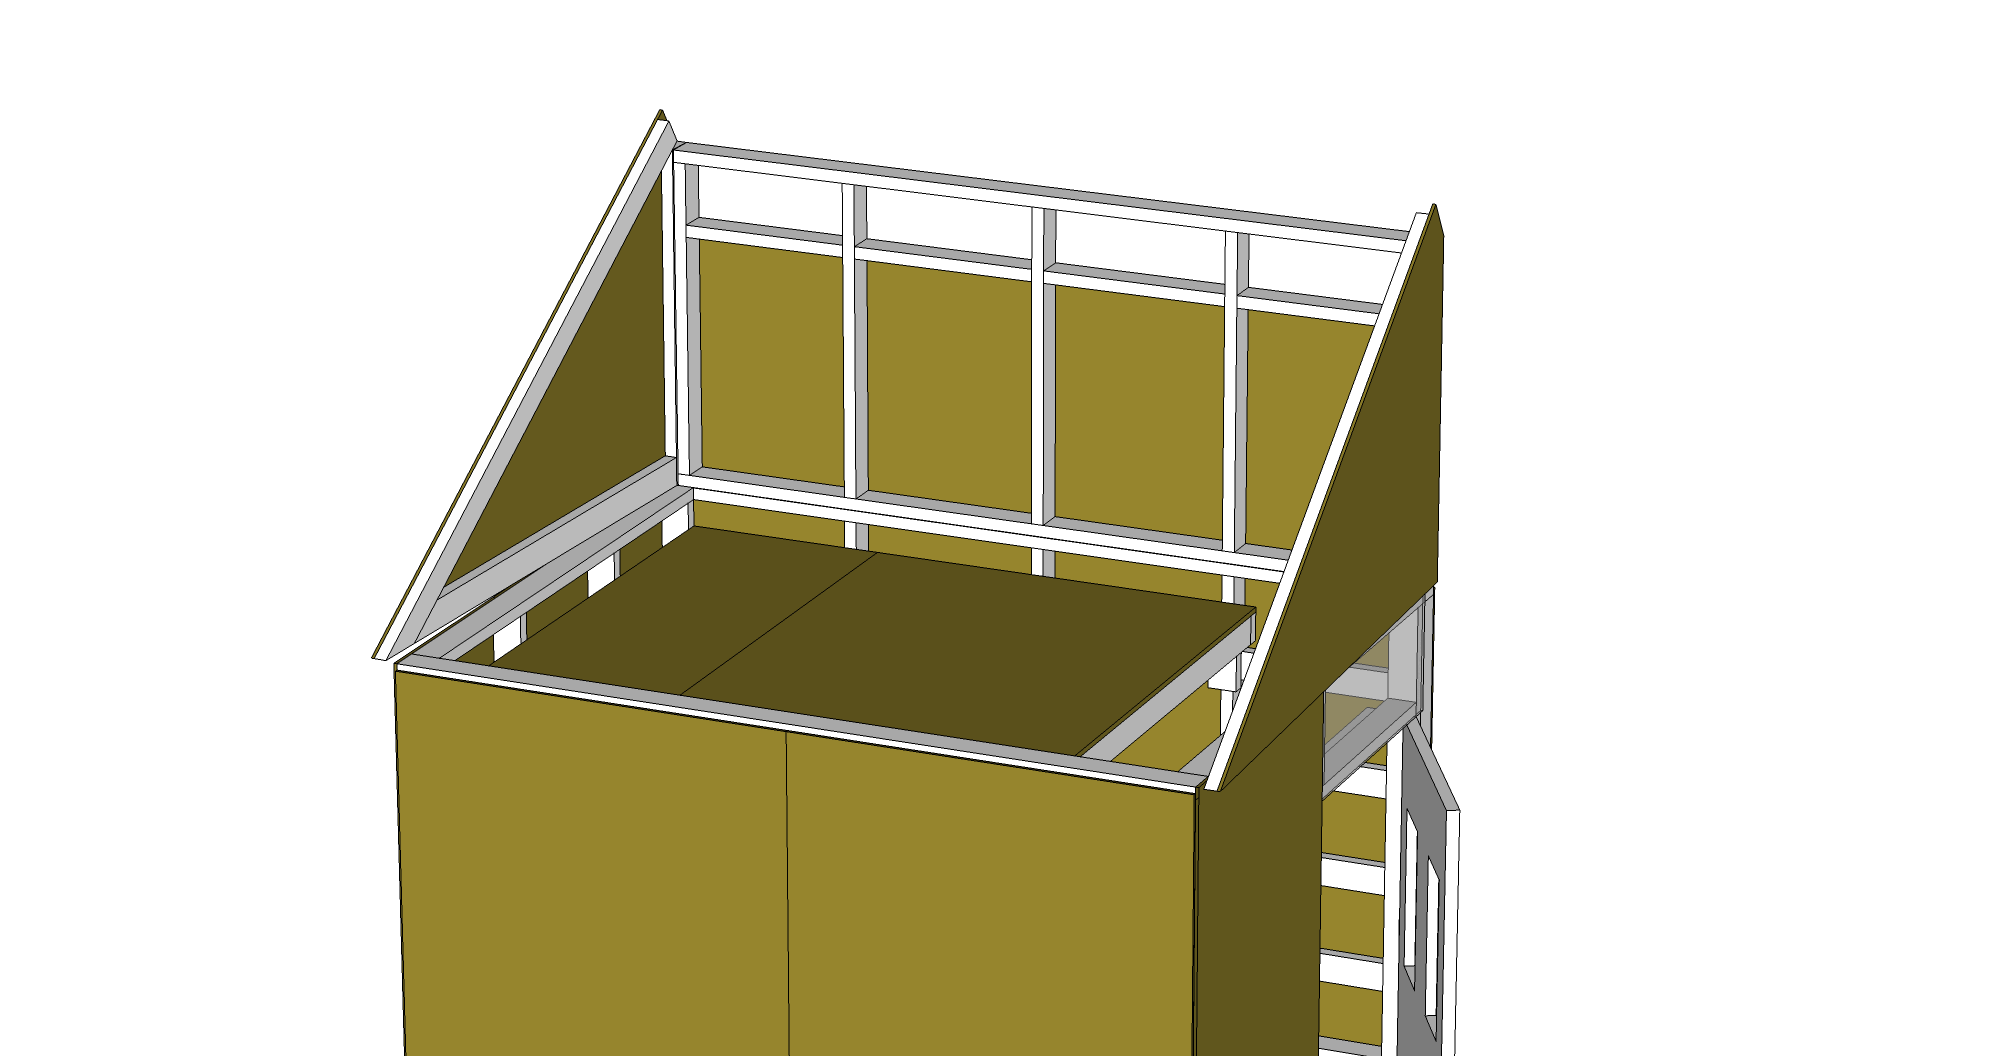
One at a time, screw each gable to the topper so the stud is facing inwards. Do not screw the gables down! Instead, kick them out slightly to ease the installation of the roof. Essentially, you're replicating the insallation of the fourth wall down on the base.
Prepare the Roof
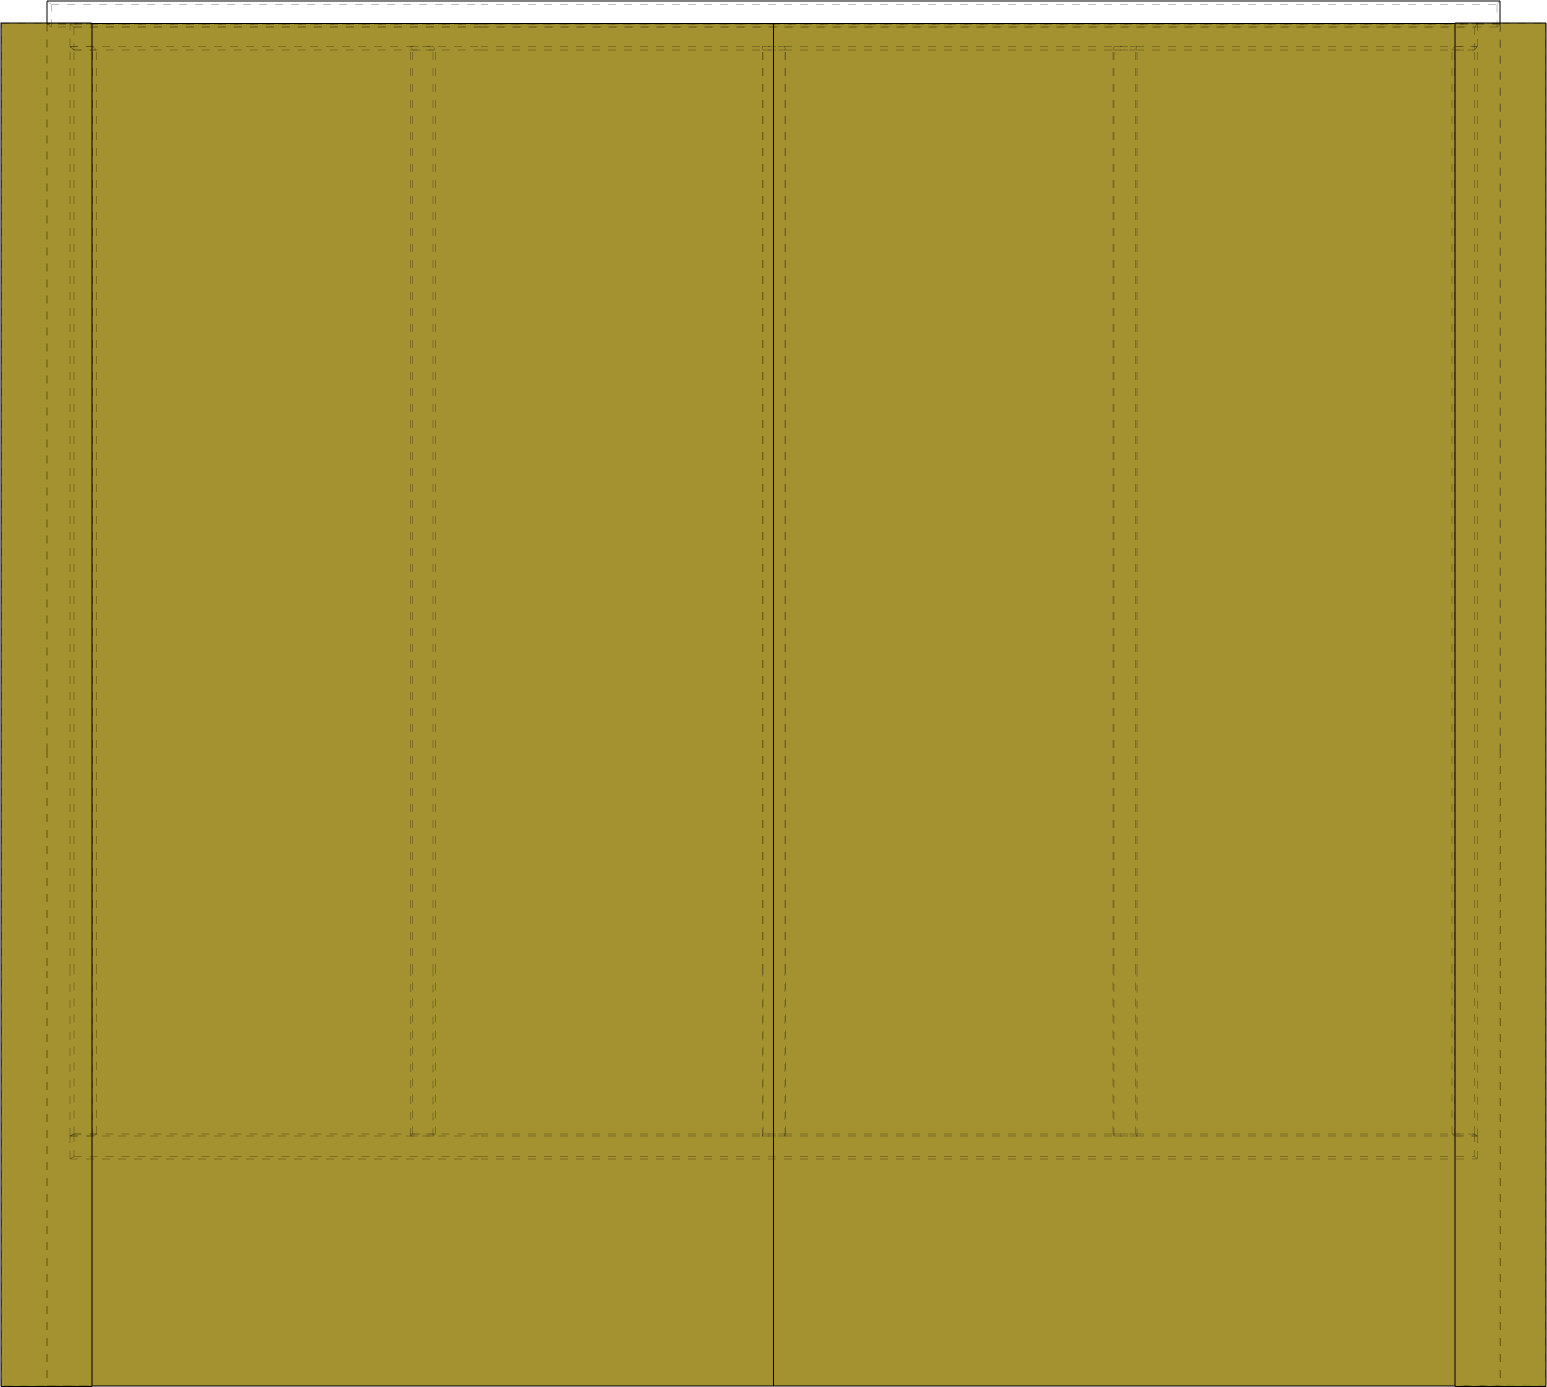
Like the floor panel, the roof panel needs a little extra preparation before it's installed. Make sure that the 96" 'lock stud' is screwed into the roof's top stud. It should protrude 1.5" on each side, matching the plywood.
Then attach in the plywood overhang strips. Be careful that the screws or nails you use to attach the overhangs to the panel sink into the outside stud - if they intrude into the original panel's 1.5" plywood overhang area, the roof panel will not sit flat on the gables.
Installing the roof
This is the step with the most potential for injury, so be absolutely certain that everyone involved knows exactly what is going to happen and how they're involved.
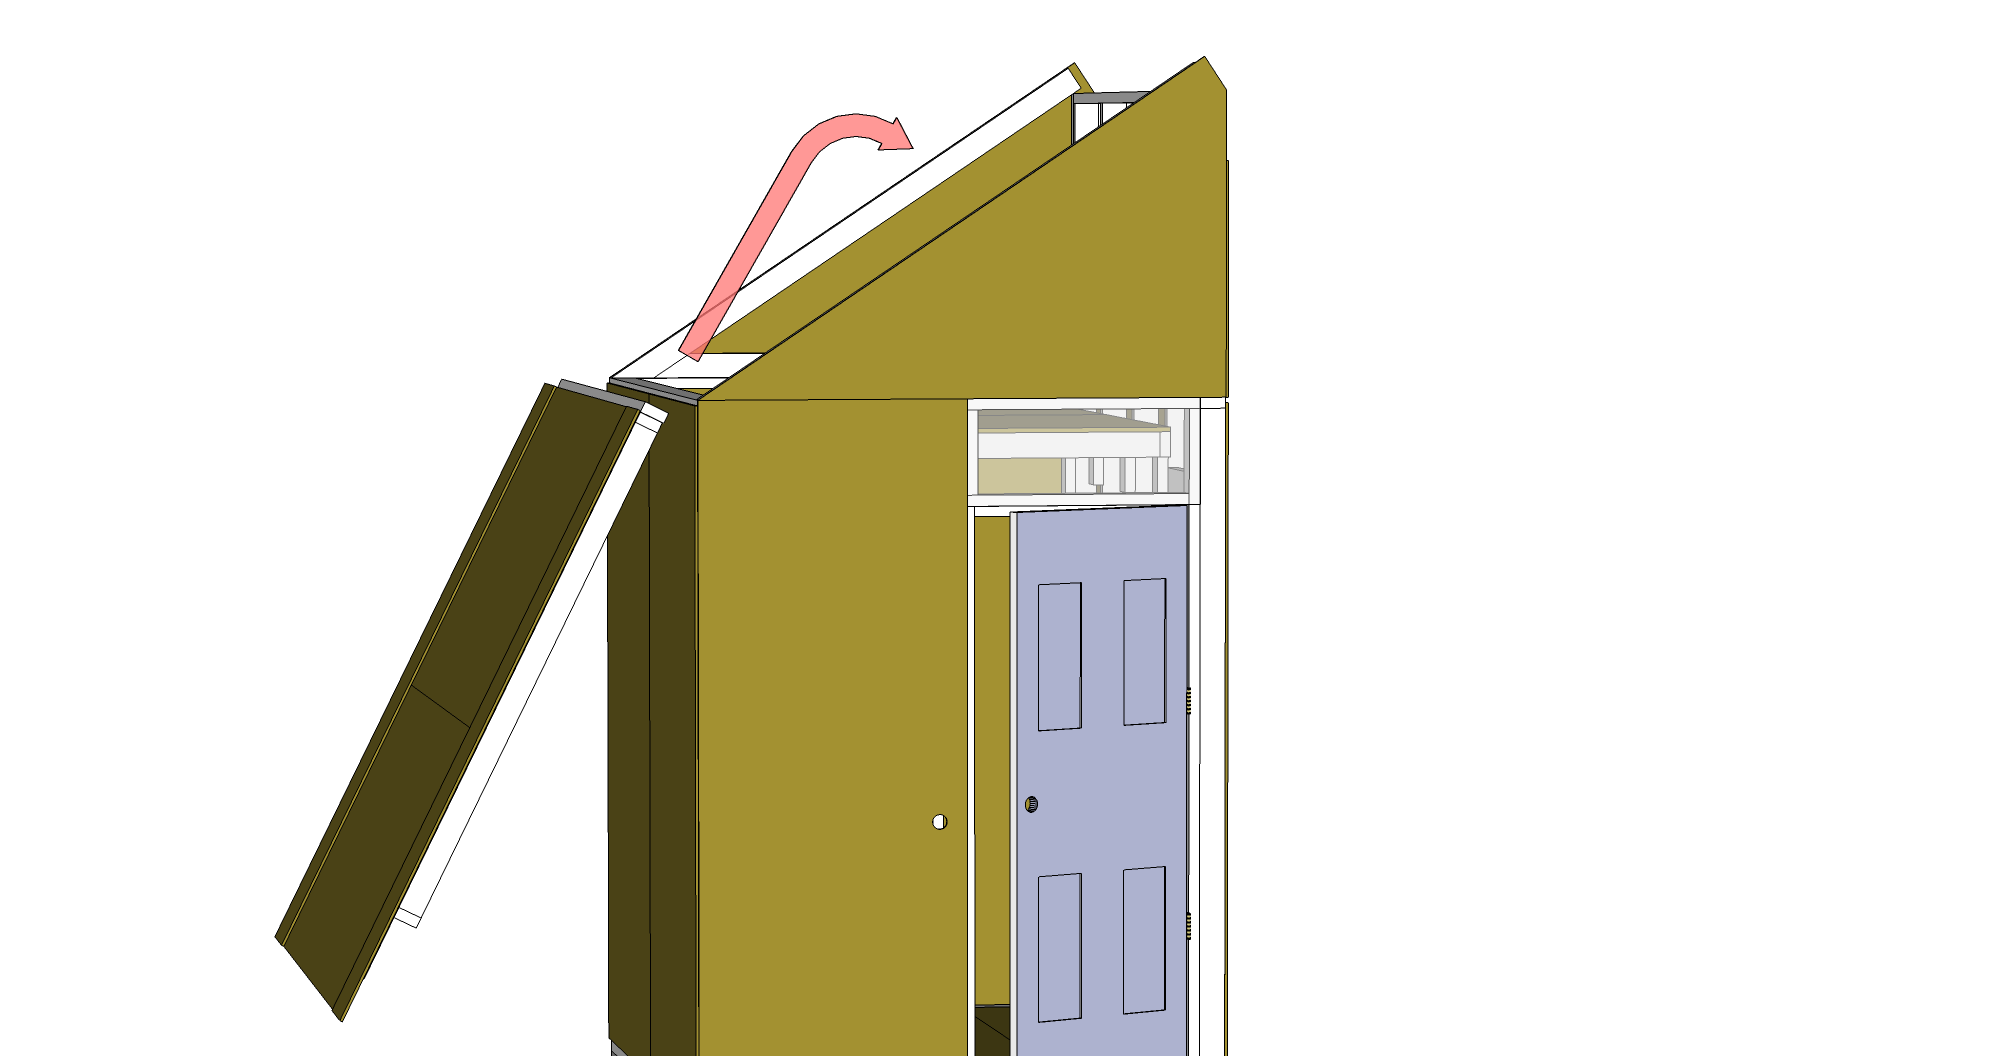
This involves two teams, a team of two on the loft and a team of at least two, preferably up to five, on the ground.
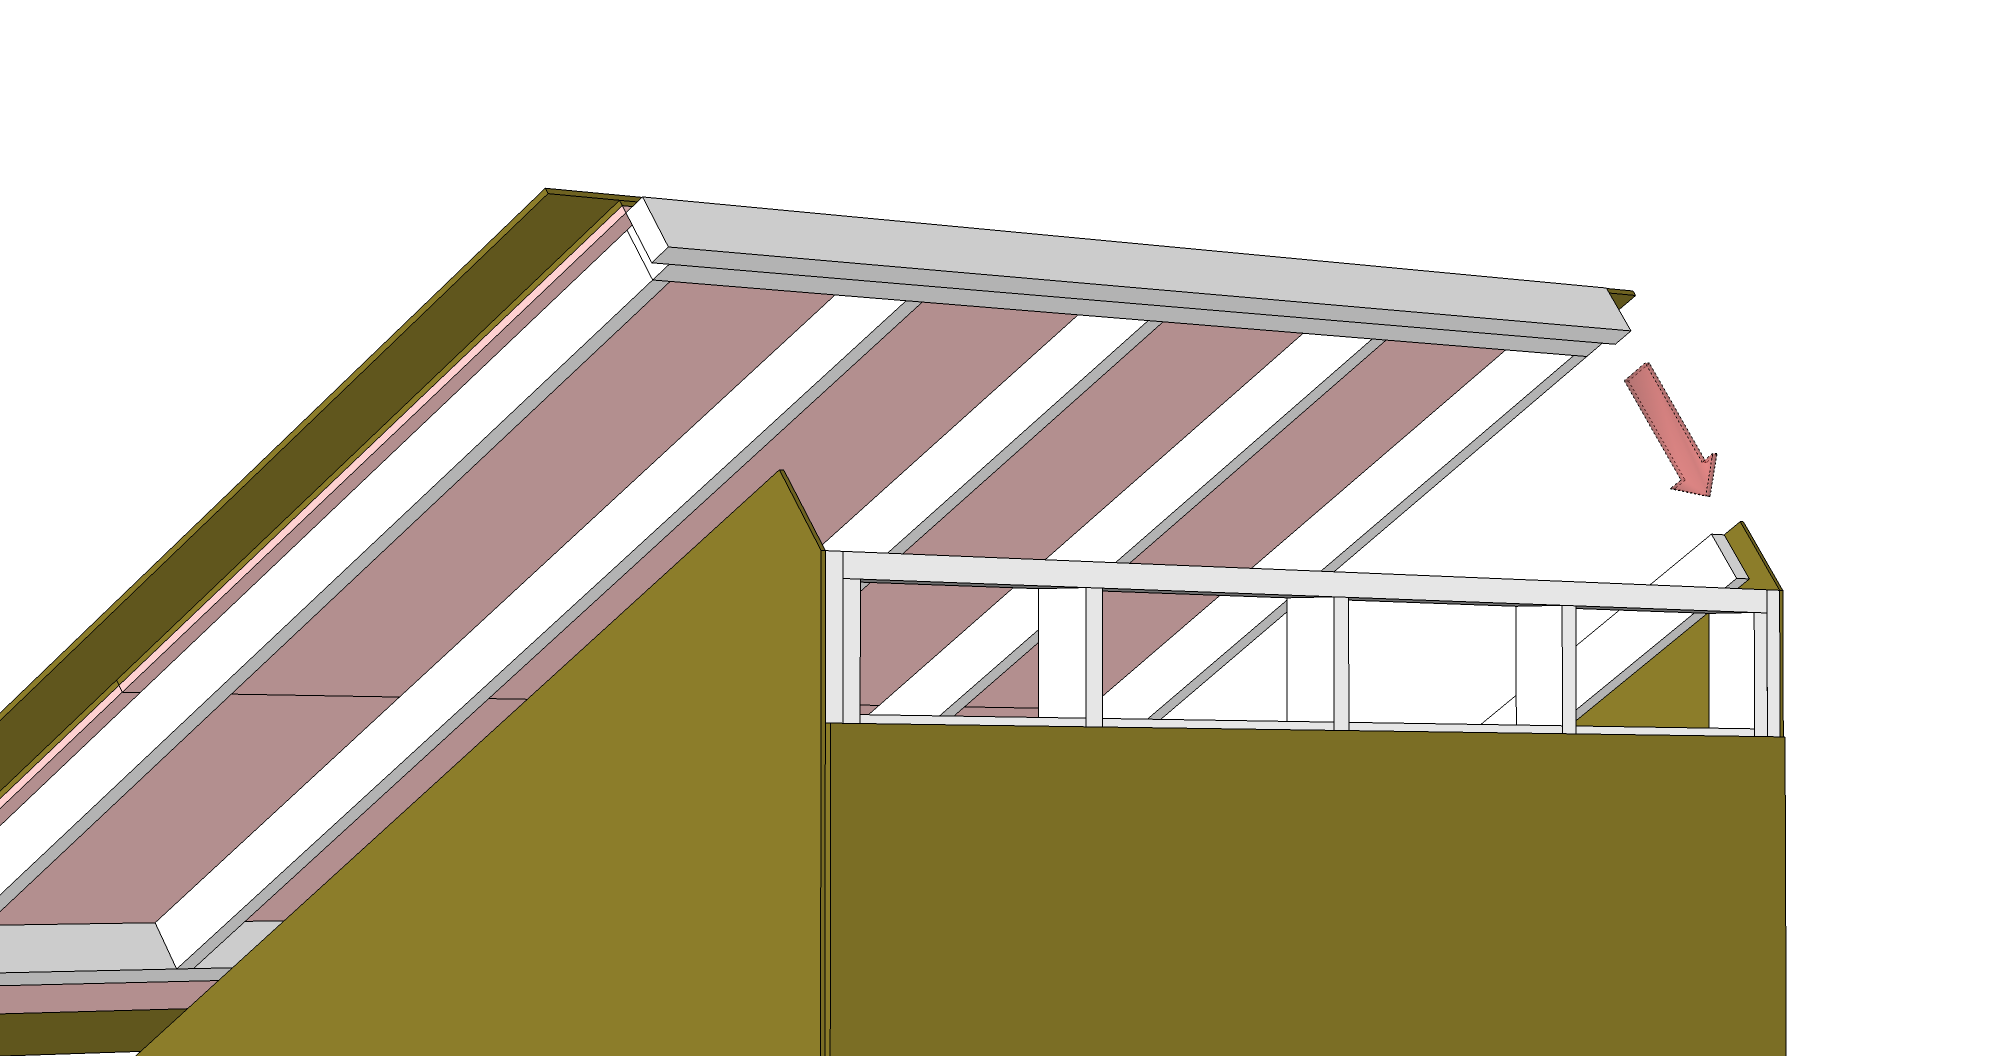
The ground team lifts up the panel to the loft team. The loft team drops the roof panel into place - the lock stud will slide into the gap at the top of the gable panels.
The sidemost studs of the roof panel should lay flush against the gables, but probably won't. Don't panic! One gable at a time, the loft team should lift up the roof just enough to have the ground team shove the gables into place from the outside. Once the gables are nicely against the roof, screw the roof stud to the gables from the inside.
Finishing the roof

Install the front overhang.
Cut the roll roofing into 9 foot rolls, so there's no more than a couple of inches protruding from each side. Using a stapler (hammer tacker works great here), install the roll roofing from the bottom up. The remnants from the roll make a good ridge cap.
Final Details
If you're insulating the floor, install an inch of rigid insulation topped with a 1/2" of plywood.
Install the ladder rungs to the loft. The ladder rungs should be in the corner of the higher side of the roof, not the lower side.
Install the door if you haven't already.
Paint the exterior. Go around the interior with a caulk gun and seal any air gaps.