Assembly Guide
Step 1 - Setting the floor
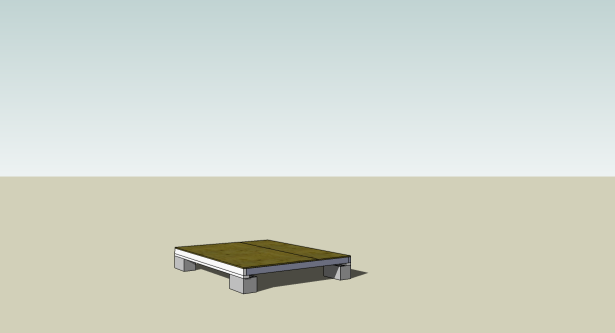
If you haven't already, flip the floor panel over and install the rails. The rails helps the floor studs from pulling apart under the pressure of the hut's weight; they also serve as a sacrificial layer between the floor and the cinderblock it sits upon.
Turn the floor panel back over and place on the cinder blocks. It's important to make sure that the floor is flat and level; a floor that's not flat will have problems when you try to put the roof on later.
Use a level to check for levelness. To check the floor for flatness, sight from corner to corner, or lay the ridge beam from corner to corner. Diagonal gaps or bumps will indicate high or low corners.
Step 2 - Put up the back wall and a side wall
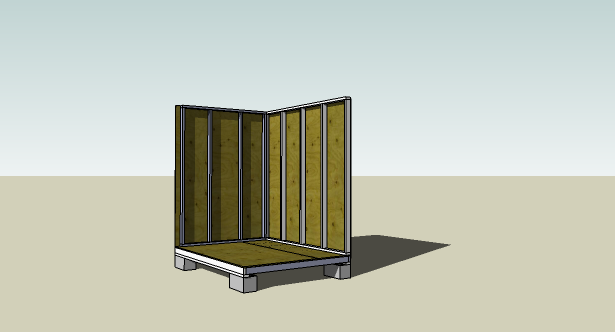
Put in the back wall and a side wall, sliding them up snugly against each other and against the floor. The flap of the rear panel should cover the rear stud of the side panel completely. Nail down the panels to the floor and to each other at the corner.
Step 3 - Put up the second side wall
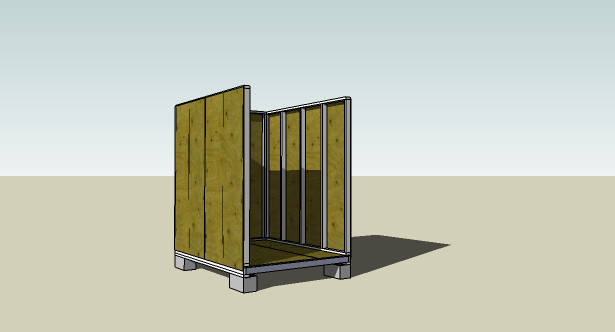
Put in the second side wall and attach it at the corner to the back panel, but do not nail the side panel down to the floor yet. This will allow you to swing it a little out of the way to install the front panel.
Step 4 - Put up the front wall
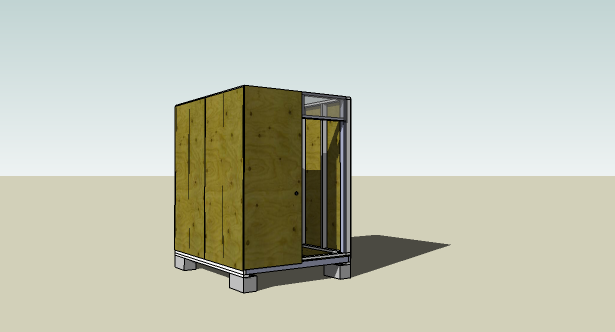
Slide the front wall into place, nail it down to the floor, and attach it to the side walls. Nail down the second side wall to the floor.
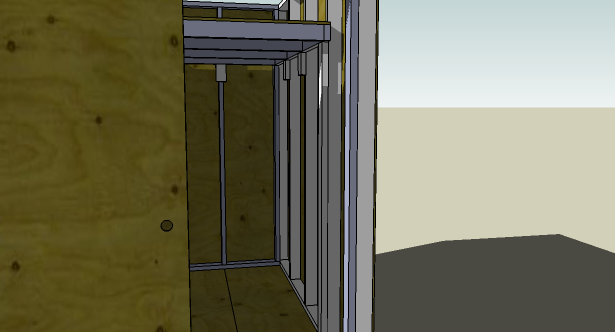
Step 5 - install the loft supports
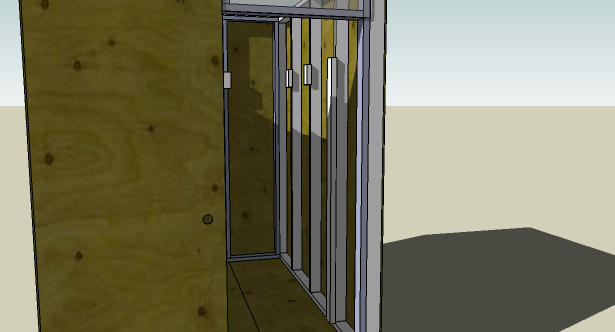
Pick a height that is at least 2 inches taller than your client, and mark a line at that height on the middle studs of the back panel and the side panels - don't worry about the corners. Nail the loft support studs so that the tops of the studs are at the marks, reserving the long loft support/ladder support stud for the side wall stud closest next to the doorway. Use two nails per support to add strength and to keep them from twisting. The long stud should clear the floor by at least three inches; otherwise, it'll get in the way of installing the floor insulation.
Steps 6 - Install the loft, square the hut.
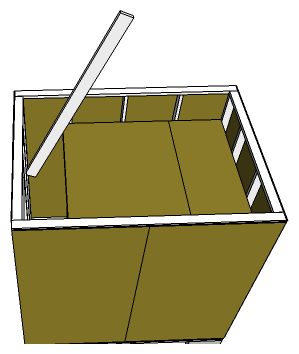
Carry the loft in through the front door. Using at least three volunteers, lift the loft up, tilted, and drop onto the loft supports. Although it may not be touching all of the loft supports, it should at least be over them.
Do not nail the loft into place until you square the hut. Although the hut may start out flat at the bottom, it's possible for the walls to twist or sag at the top corners, like a shoebox without its lid. It will be impossible to install the roof properly unless the top is squared.
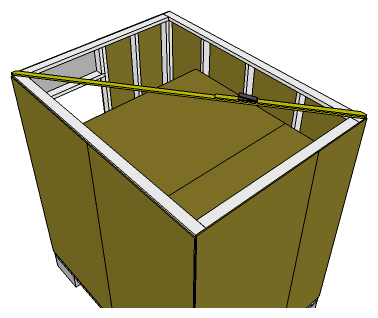
To square, measure diagonally across the top corners of the hut. You can either do this from outside the hut, using ladders, or by having folks standing on the loft (although the loft isn't nailed down, it's safe enough resting on the supports).
Both measurements should come out to around 120 inches. If not, you have two options: push the shorter diagonal out or pull the longer diagonal in.
To push the shorter diagonal out, stand on the loft wedge the ridgebeam between the loft and the front wall against the short corner. The ridge beam can then be used as a lever to bully the loft into position:
To pull the longer diagonal in, use a heavy tie-down strap to crank the long corners inwards:
Once the diagonals are within a half inch of each other, nail the loft panel into place against the studs, right above the loft supports.
Step 7: Install flooring, ladder, gables
At this point, your tasks are split into two types: those "up top" on the roof, and those "down below", which aren't. These two types of tasks can be run on parallel tracks. If there's a group of volunteers, it's good to have two people up top working on the roof exclusively.
On the roof: install the gables.
Down below: drop in both layers of the asphalt impregnated sheathing and top with the floor covering. Nail it down. This not only insulates the floor, but it also brings the floor up to the level of the doorway's bottom plate stud. The ladder to the loft runs between the outer edge of the doorway and the long loft support. Be sure that the ladder rungs don't intrude into the door's closing arc; also, make sure to screw the ladder rungs in instead of nailing - a person leaning outwards from the ladder could potentially pull off the entire rung and causing an accident.
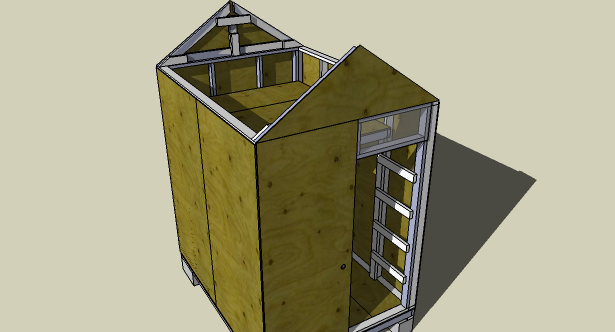
Step 8 - Up top: add ridgebeam, trusses
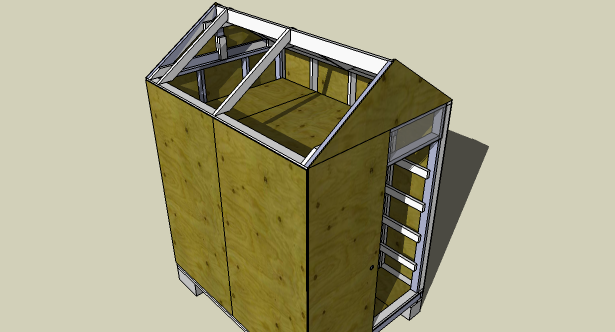
Drop the ridgebeam into the slots on the gables; if the top is properly squared and the gables are built correctly, they should drop in easily. Nail the ridgebeam into place, and then install the intermediate trusses.
Nail the trusses into place at 9" and 48" from the back. The 9" trusses provide a stud to nail the top plywood and cantilever pieces.
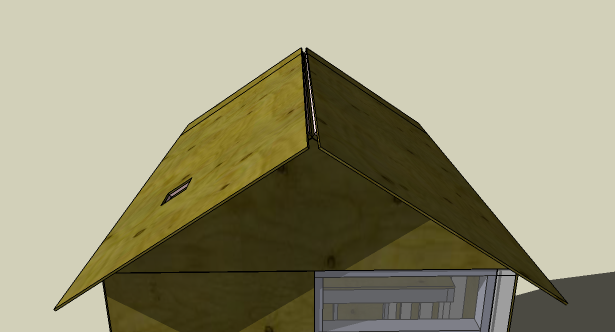
Step 9 - Up top: install first half of the roof
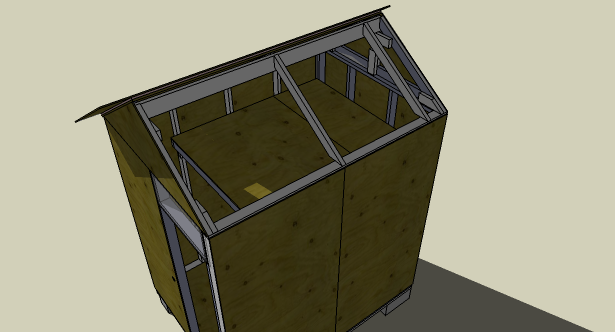
The roof has three layers: a layer of 5/8" plywood, a layer of rigid insulation, and a layer of 3/8" plywood. The 5/8" proveides strength; the insulation insulates; and the 3/8" protects the insulation and makes the overhang.
Note: it's recommended that you first install the side of the roof without the chimney hole - the hole makes it easier to maneuver the plywood into place, which is useful at the next stage, when people are actually on top of the roof.
Install the 5/8" layer of plywood, nailing it down at the ridge beam, gables, the middle truss, and at the line where the plywood touches the side wall. For the bottom line, it's simplest to have people on ladders sight and snap the line using a chalk line, and then hammer in at the bottom. Hammer about 1/2" above the chalk line for the best results.
Bring up the insulation and lightly tack into place; it only needs to hold long enough for the 3/8" to be installed on top of it.
Take the 3/8" cover plywood and nail it down to the ridge beam and front gable, with the back edge nailed to the 9" intermediate truss:
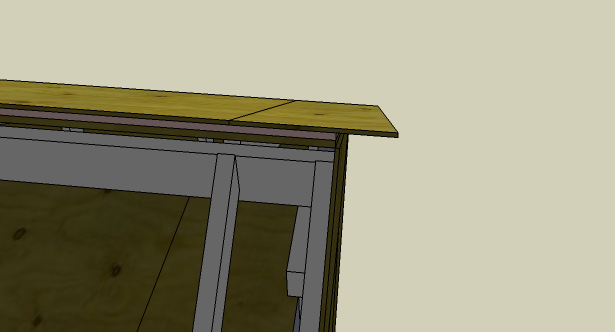
This will create a nine inch overhang for the front of the hut. Attach the back overhang piece to the same 9" truss to create the rear overhang.
Step 10 - Up top: Finish the roof.
Create temporary footboards by nailing scraps of stud to the roof. Do not drive the nails in all the way - that'll make it harder to remove the footboards. The footboards are what the roof team stands on while finishing the roof.
Install the second half of the roof just like the first half. While this is happening, a team down below can cut up the roll roofing. One roll will make three 10' strips of roll roofing and several 1' strips for use as a ridge cap. Install the roofing, making sure to make room for the stovepipe flashing.
Step 11 - Down below: Install the door
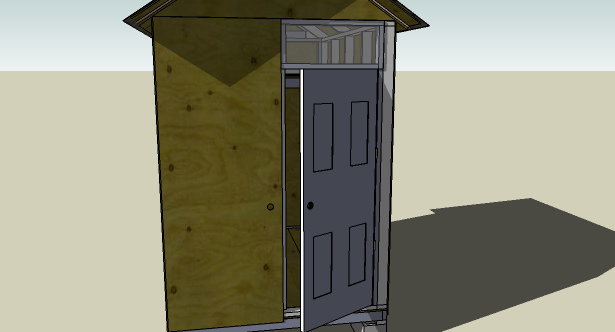
Hang the door; it should swing outward, and hang from the outer edge of the front panel. Once it's hung, mark on the interior of the door opening where the doors naturally rests when it's closed. Attach 2x4 studs along the inside of the doorway along the line to prevent people from kicking in the door.
